July 3, 2023
How to Create an Online Course with Circle

Carly
The biggest problem with creating an online course is that you probably won’t even start. That’s because creating an online course is a complicated process and involves a ton of work. But the good news is that with a clear framework and the right tools, creating an online course can be pretty straightforward.
This guide will walk you through Circle, a great platform for hosting and monetizing courses. We’ll also get into another neat tool, Tella, an all-in-one screen recorder that makes creating video content for courses a breeze. So let's get into how to create an online course from scratch.
Why Circle?
The great thing about Circle is that it combines online courses with an online community. The beauty of an online community is that you can monetize it with memberships and earn recurring revenue, meaning your members pay a periodic subscription fee to access the community and its content.
You may be wondering - what’s the content? Well, that’s where your online courses come in. Each new course you make adds value to your community and helps drive member retention. It’s a bit like Netflix - subscribers keep paying for the product month after month, year after year, because there's always fresh content to enjoy. So, think about your course like a new tv series being added to Netflix. It’ll keep people coming back and paying for the community.
And if you're not sure whether Circle is for you, check out this guide on other similar platforms and how they compare.
Courses in Circle
When you sign up for Circle, you’ll be asked to choose a community template. If your main focus is to create online courses, choose the ‘Courses’ option.

Once you’ve made your way through the onboarding process, head over to the panel on the top left-hand side and click on ‘Courses.’

You’ll then be taken into the Courses section, where you can see three example courses named Modules 1, 2 and 3. Go ahead and click on one of them to get a sense of how to create a course.
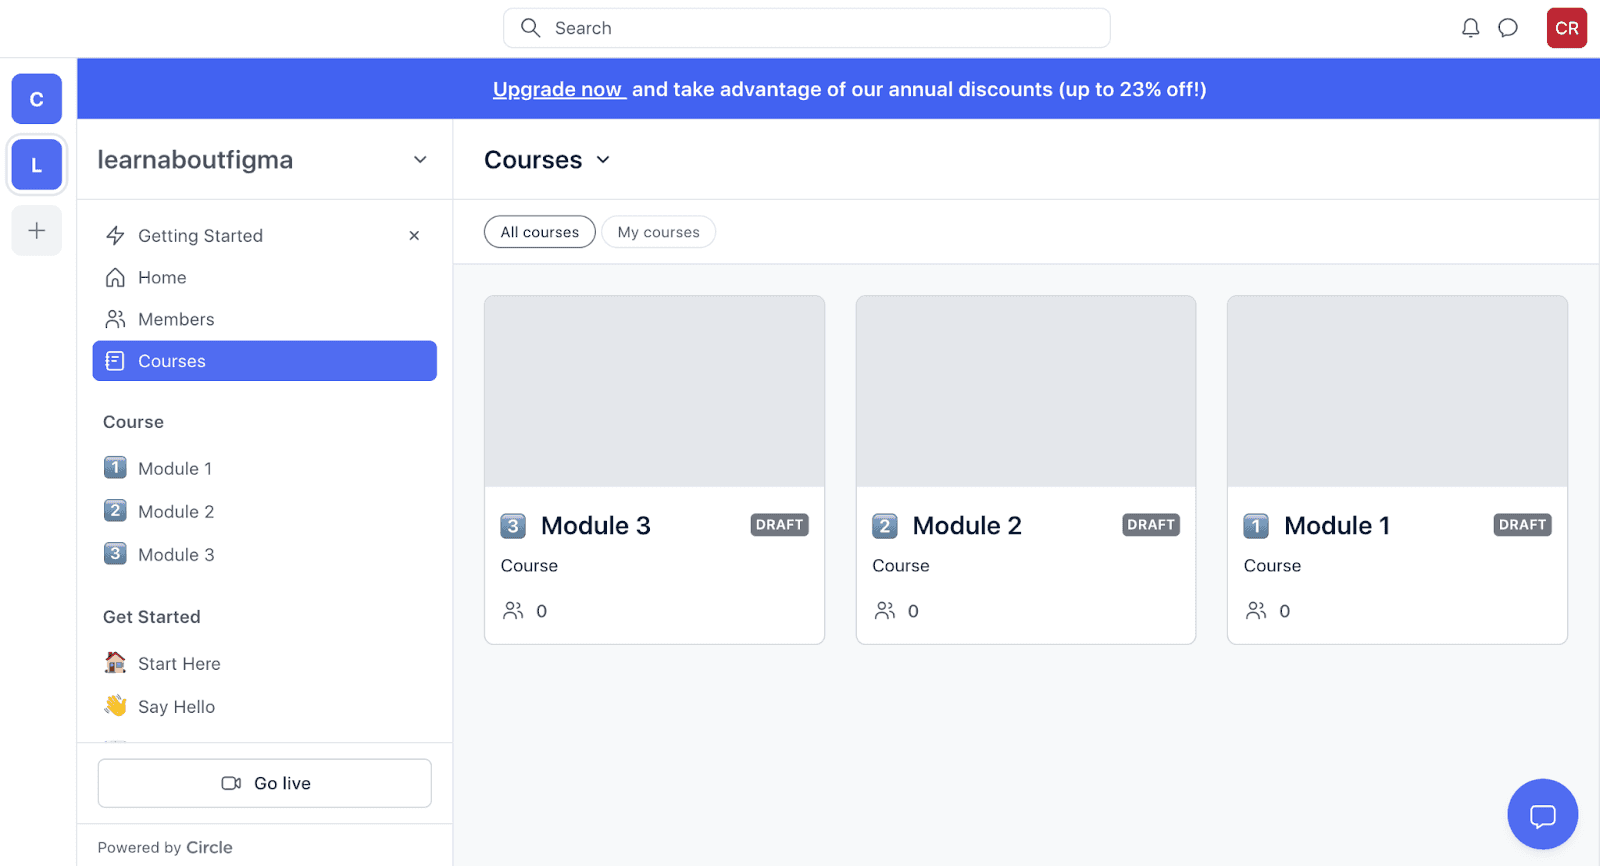
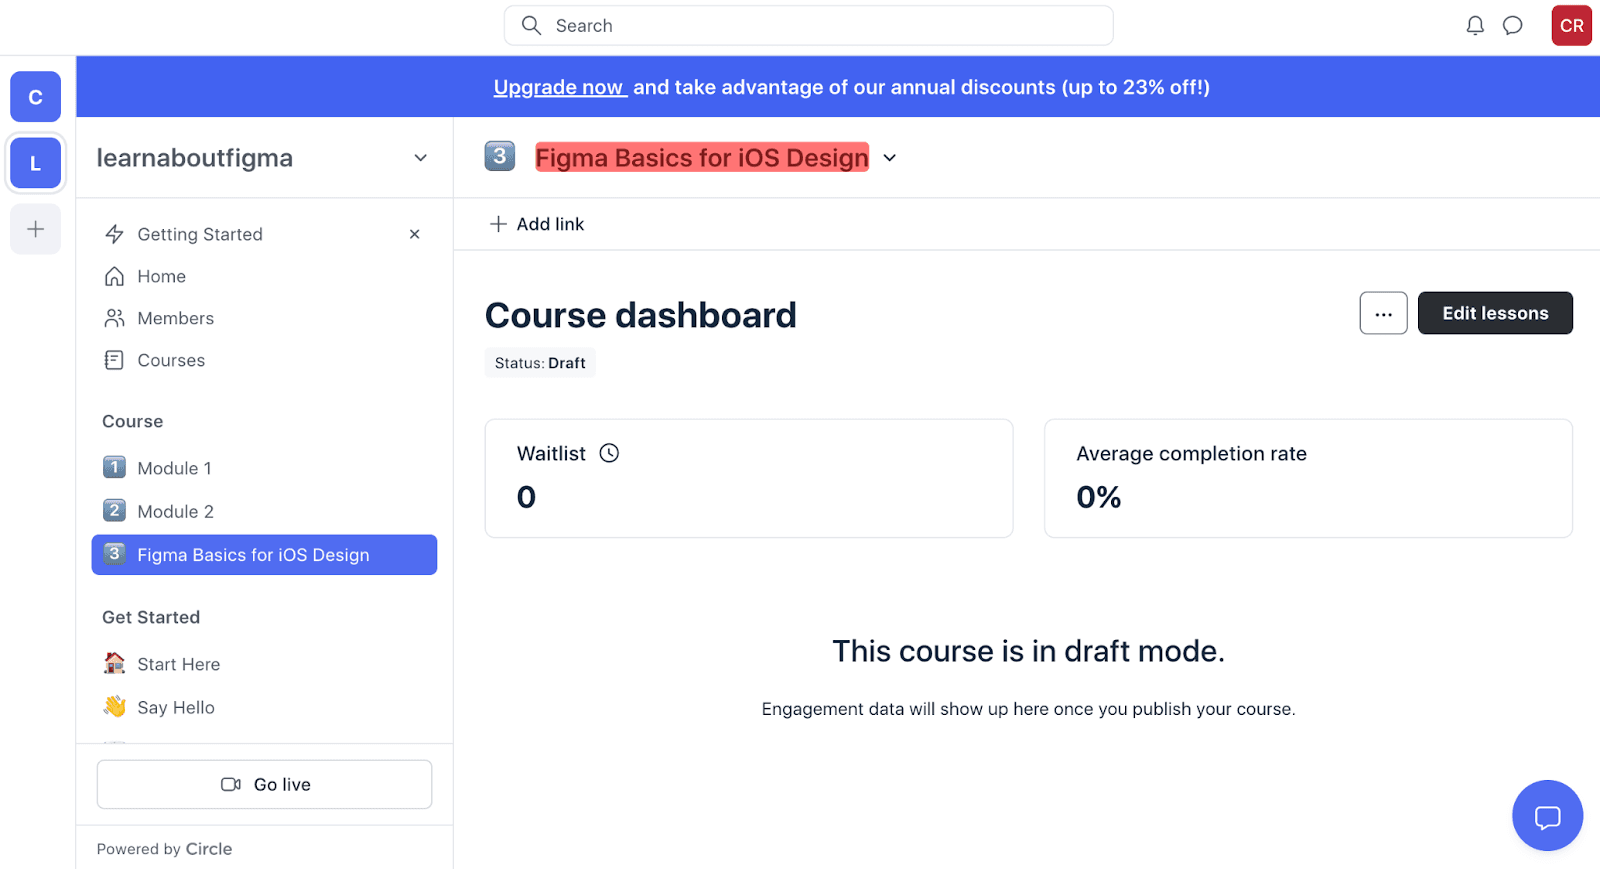
You’ll be directed to the Course dashboard in draft mode. To add a lesson, simply click ‘Edit lessons.’

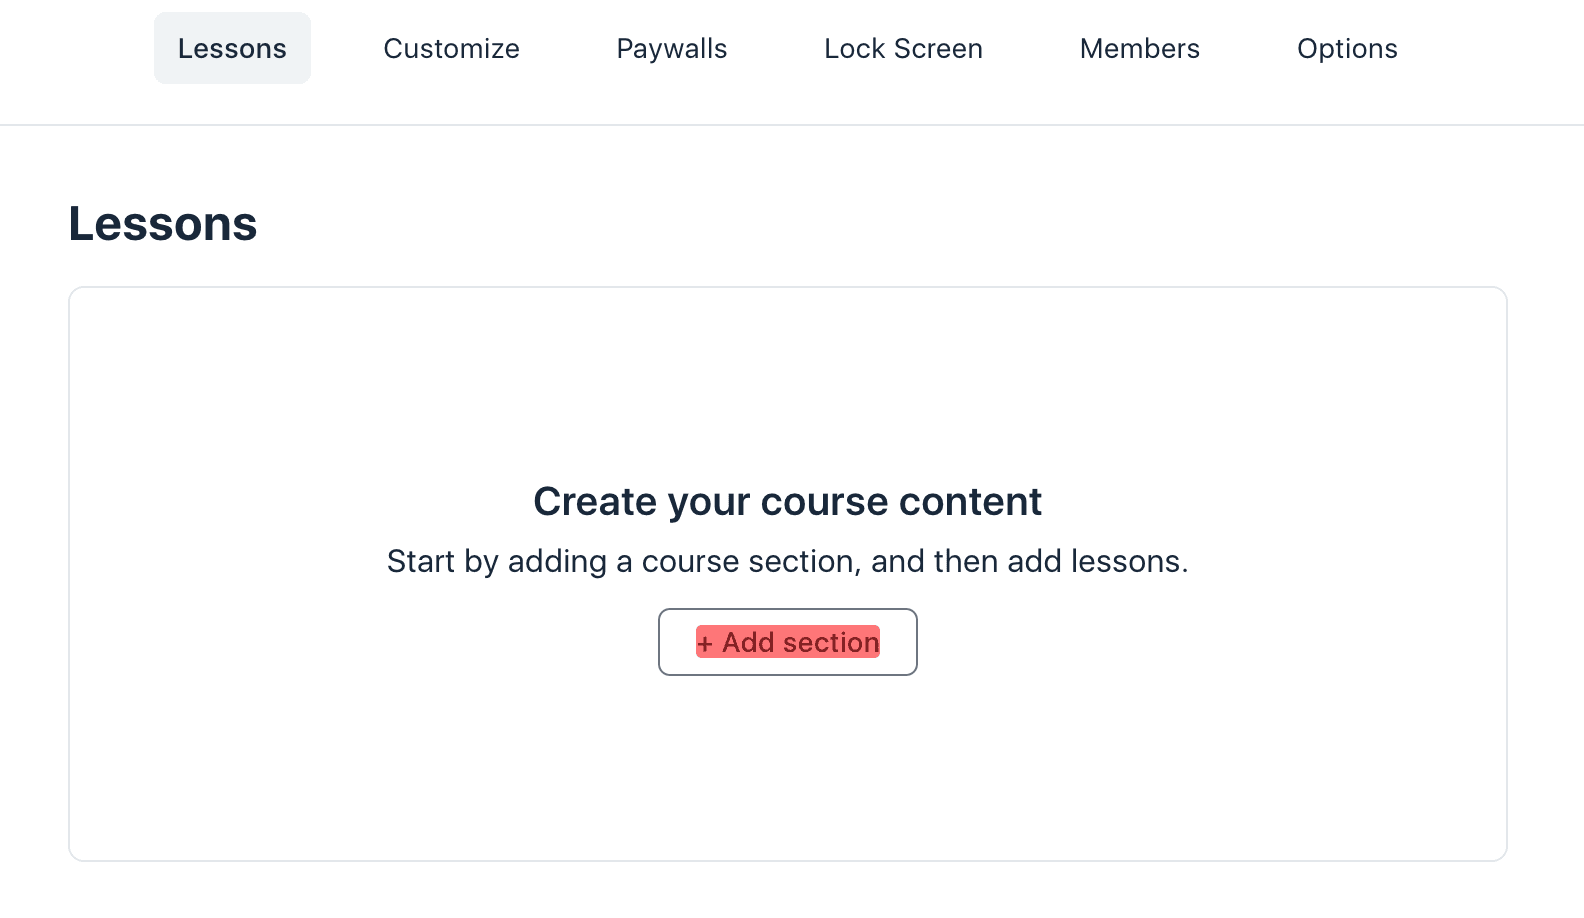
Next, click ‘Add section’ to start grouping lessons together, and select ‘Add lesson’ to add lessons to your section.
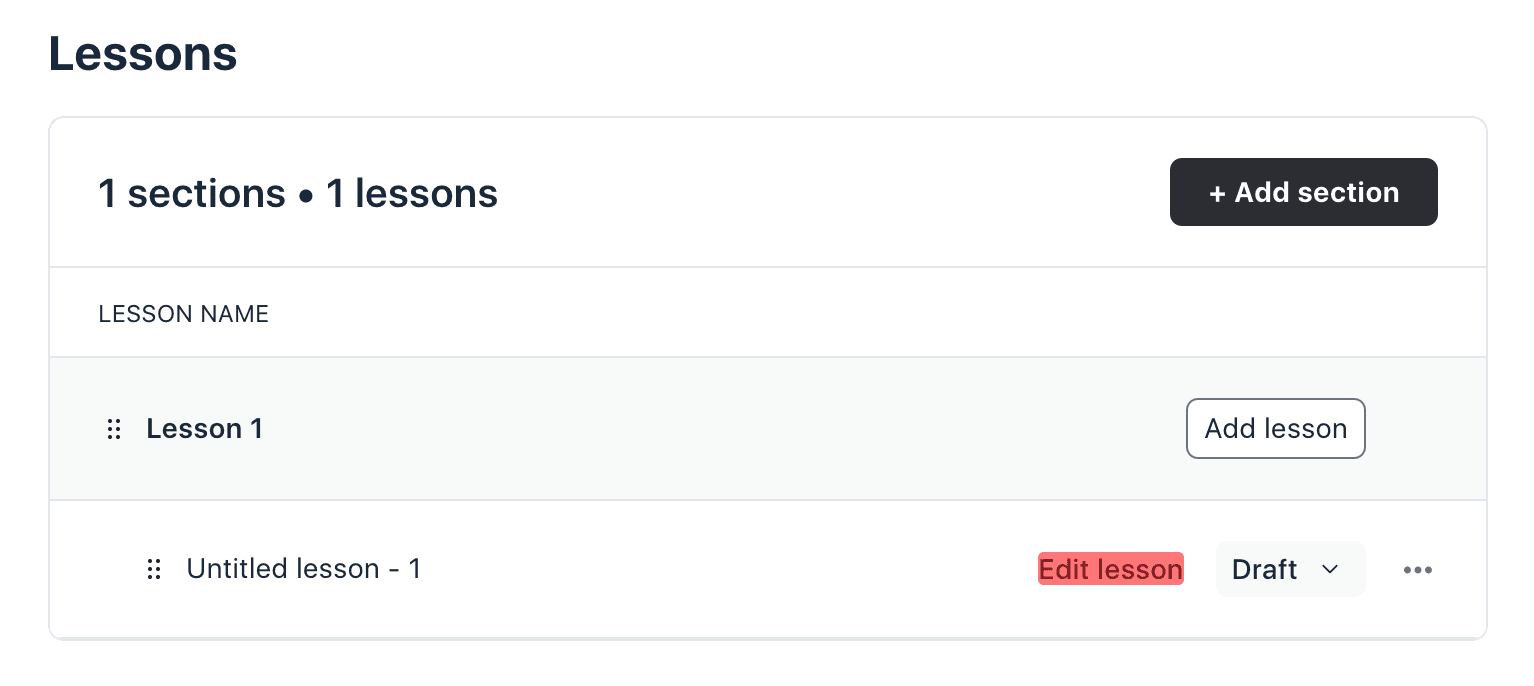
Give your lesson a name and choose its status (draft or published). Now, you’re ready to start adding content to your lesson. To do that, hover over your lesson and click ‘Edit lesson.’
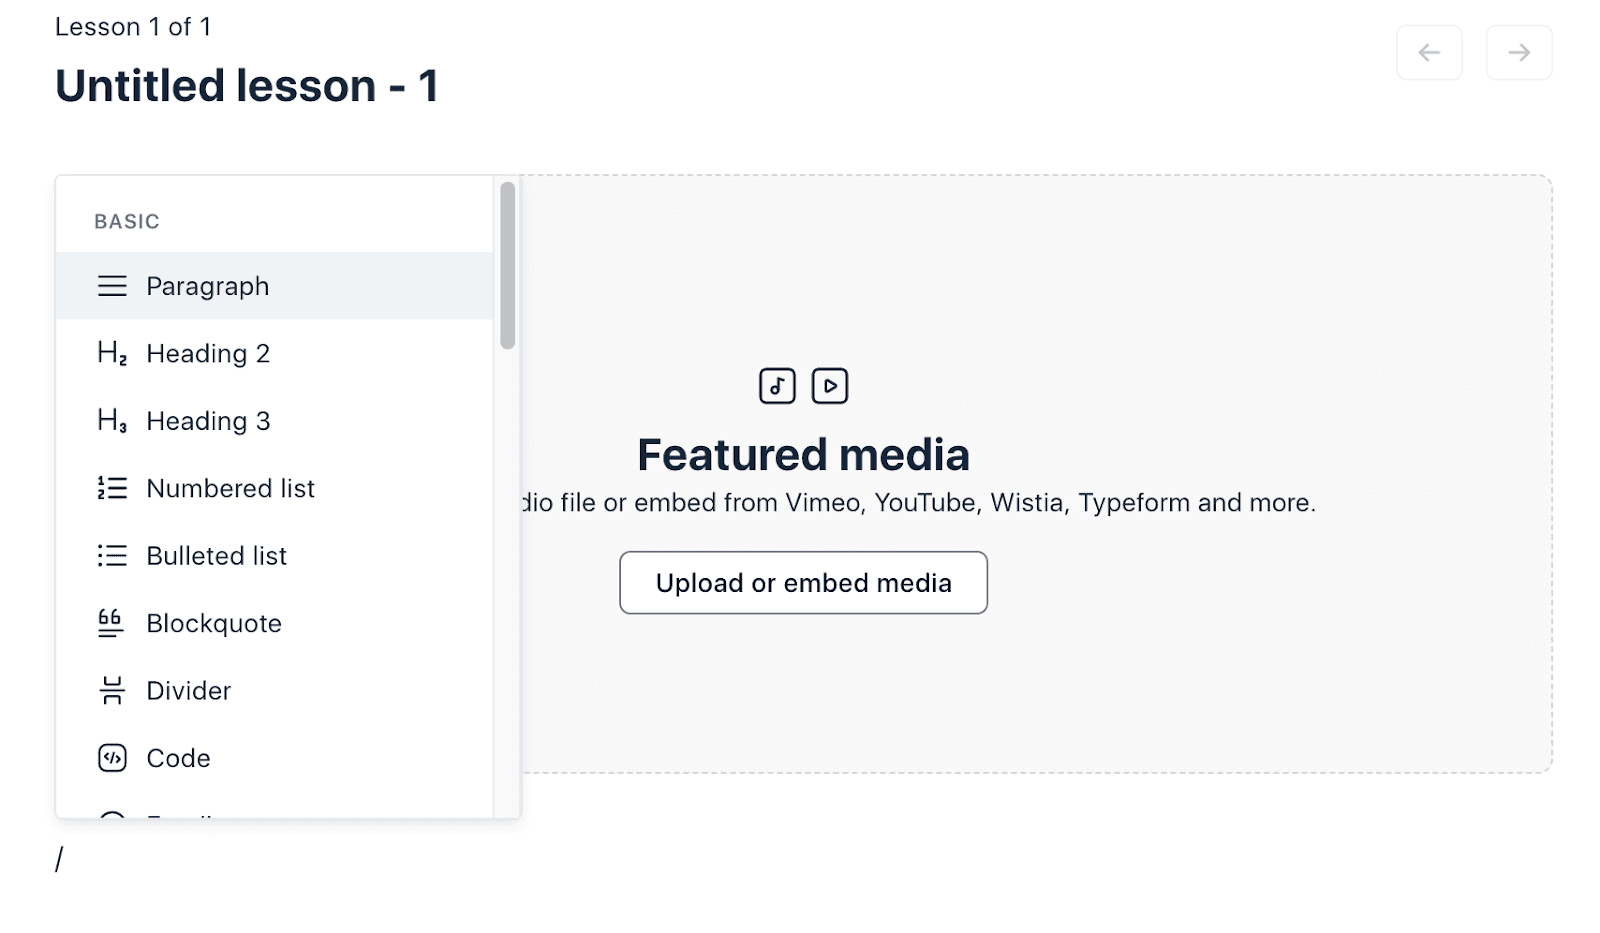
This will take you to the lesson editor, where you can create and customize your lesson. On the left-hand side, you'll find settings you can adjust to suit your needs. In the middle of the screen, you’ll see the option to upload or embed video and audio files, which Circle refers to as featured media.
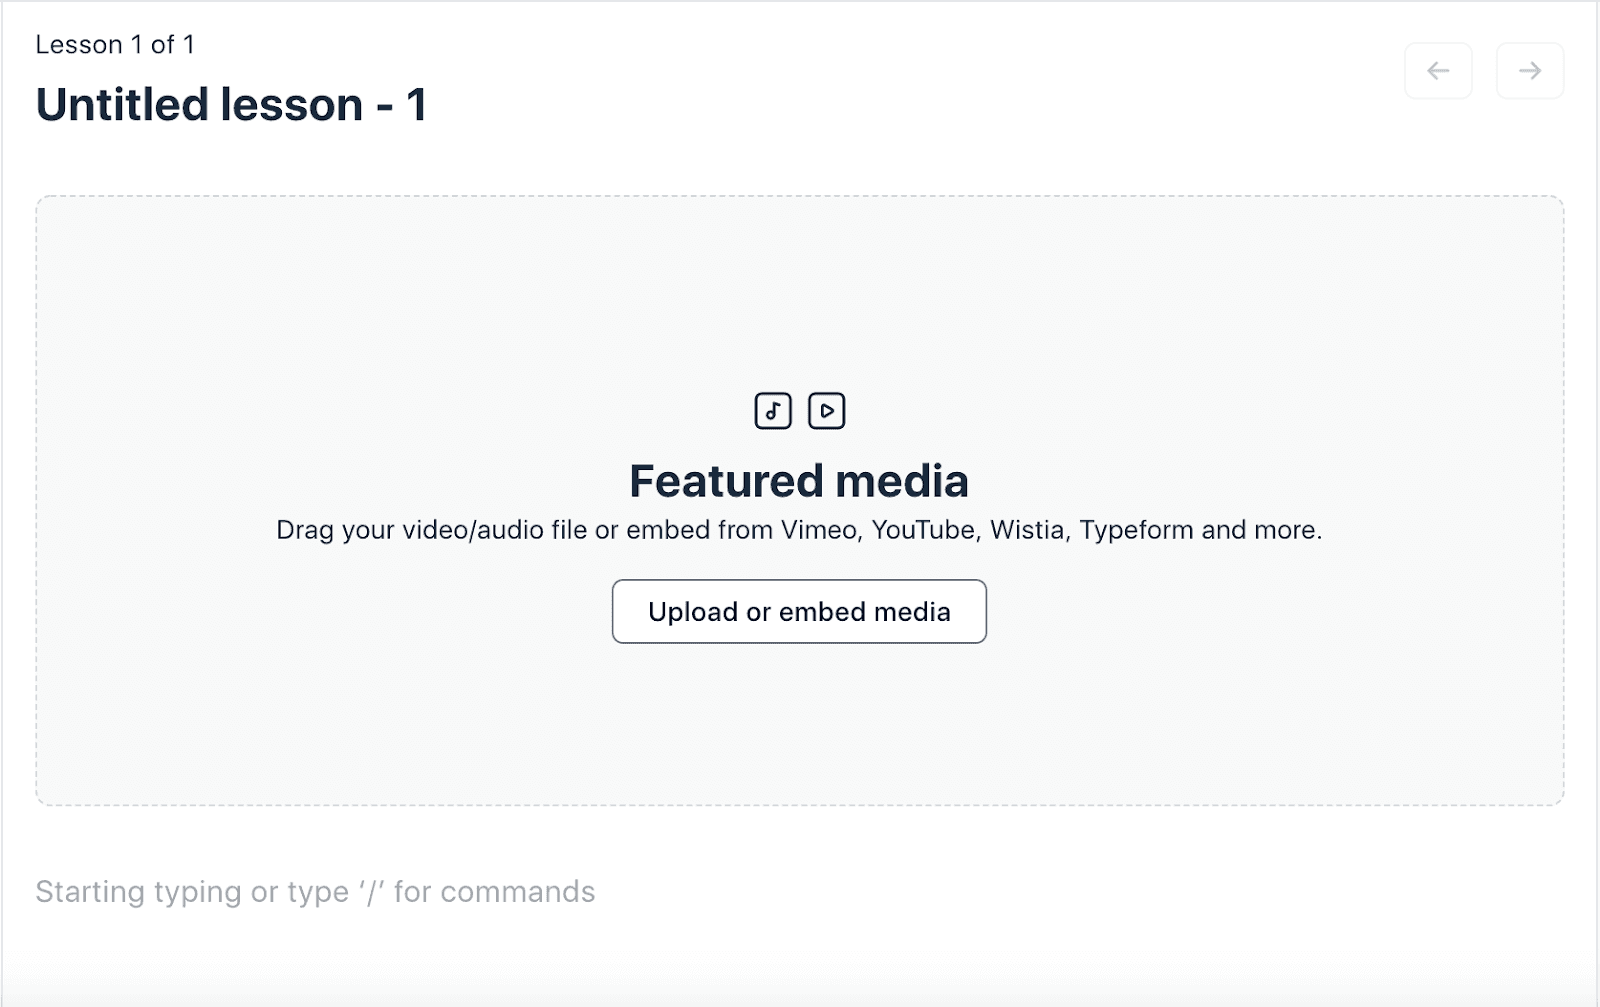
Below that, you can add static media, which refers to content that doesn't move or change. It includes things like text, images, graphics, or slides that stay the same throughout your course without any interactive features.
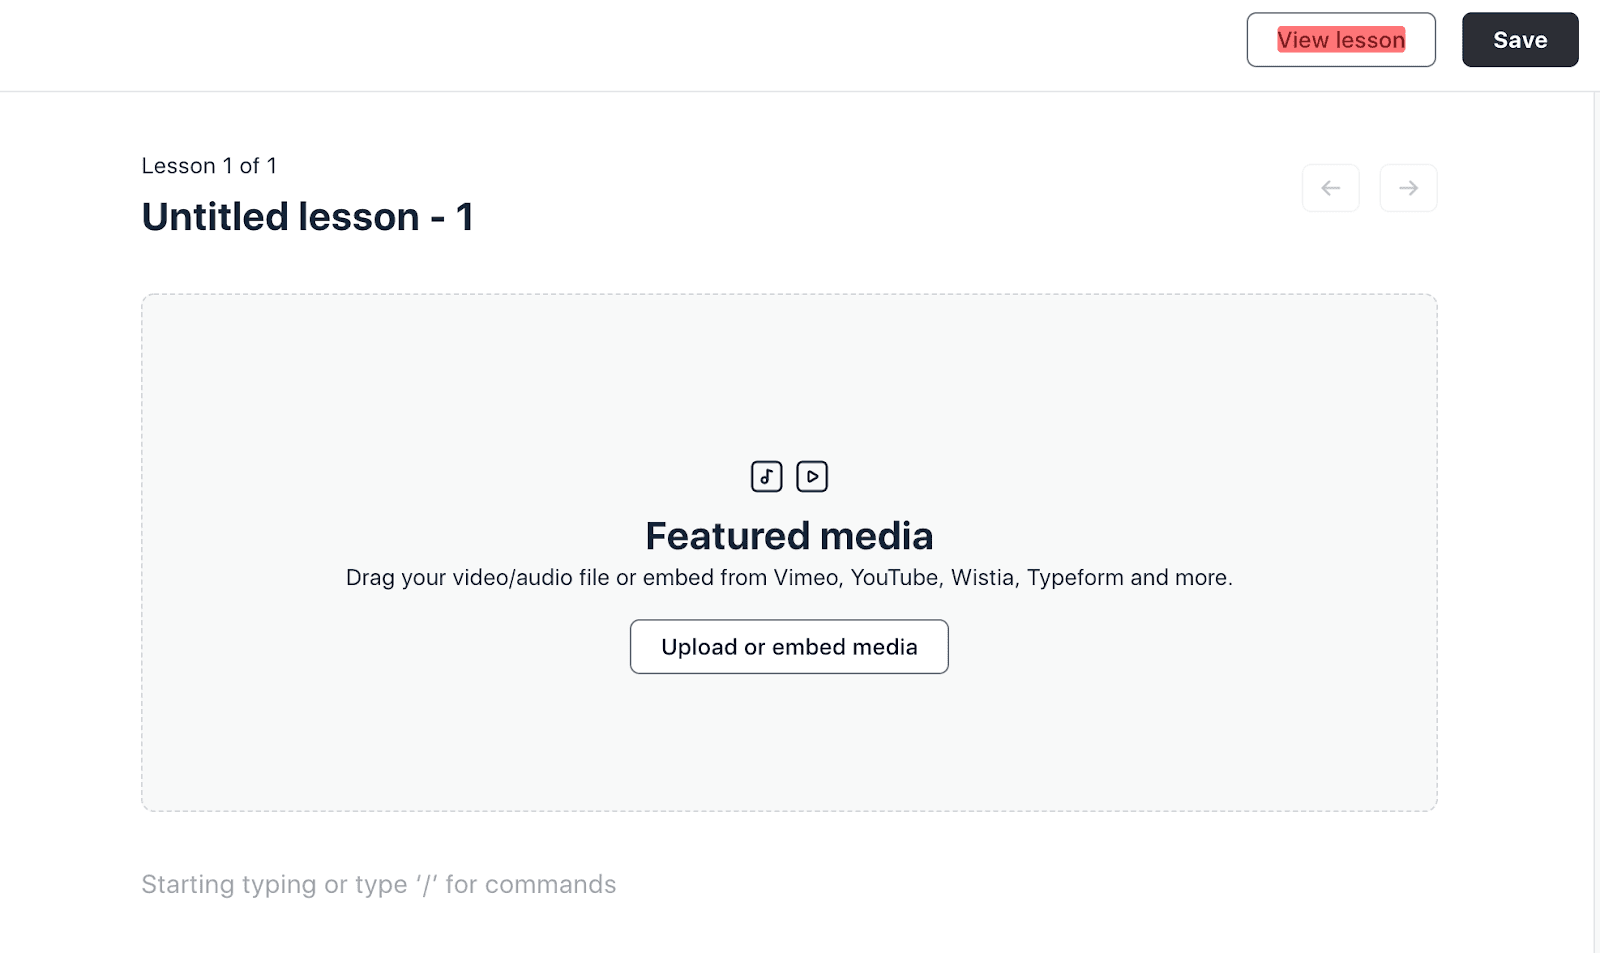
A helpful part of Circle is the ability to view your lesson at any point. Simply hit ‘View lesson’ at the top right-hand corner of your screen to preview your lesson exactly how your students will see it.
So, now that you know a little bit about how Circle works, let’s dive into how you can actually start working on a course.
A simple framework for courses
When it comes to creating your course, it’s helpful to follow a framework we like to call TICR. It gives you a step-by-step approach to follow, making the whole process straightforward and organized. Let’s get into it.
Topic
This is where you choose a topic. Try to focus on choosing a topic as specific as possible. The idea here is to make the rest of the process easier by giving yourself some constraints to work with. However, try not to worry about being too specific - there’s no reason why you can’t create another course in the future about a different, very specific topic.
For example, if you compare the topic ‘User Interface Design’ with ‘User Interface Design for iOS on Figma,’ the latter is much more specific. It gives us much less surface area to cover and means we’ll be able to go deeper, giving our students more value in the end. Remember, you’re creating an online course, not an entire university curriculum.
Instructional design
Decide on the goals you want your students to reach by the end of your course, and work out the structure they can follow to achieve those goals. The idea here is to determine what the lessons are and how they’ll be organized. Take a look at the notes below, put together using Notion, to get an idea of how you can carve out your instructional design.
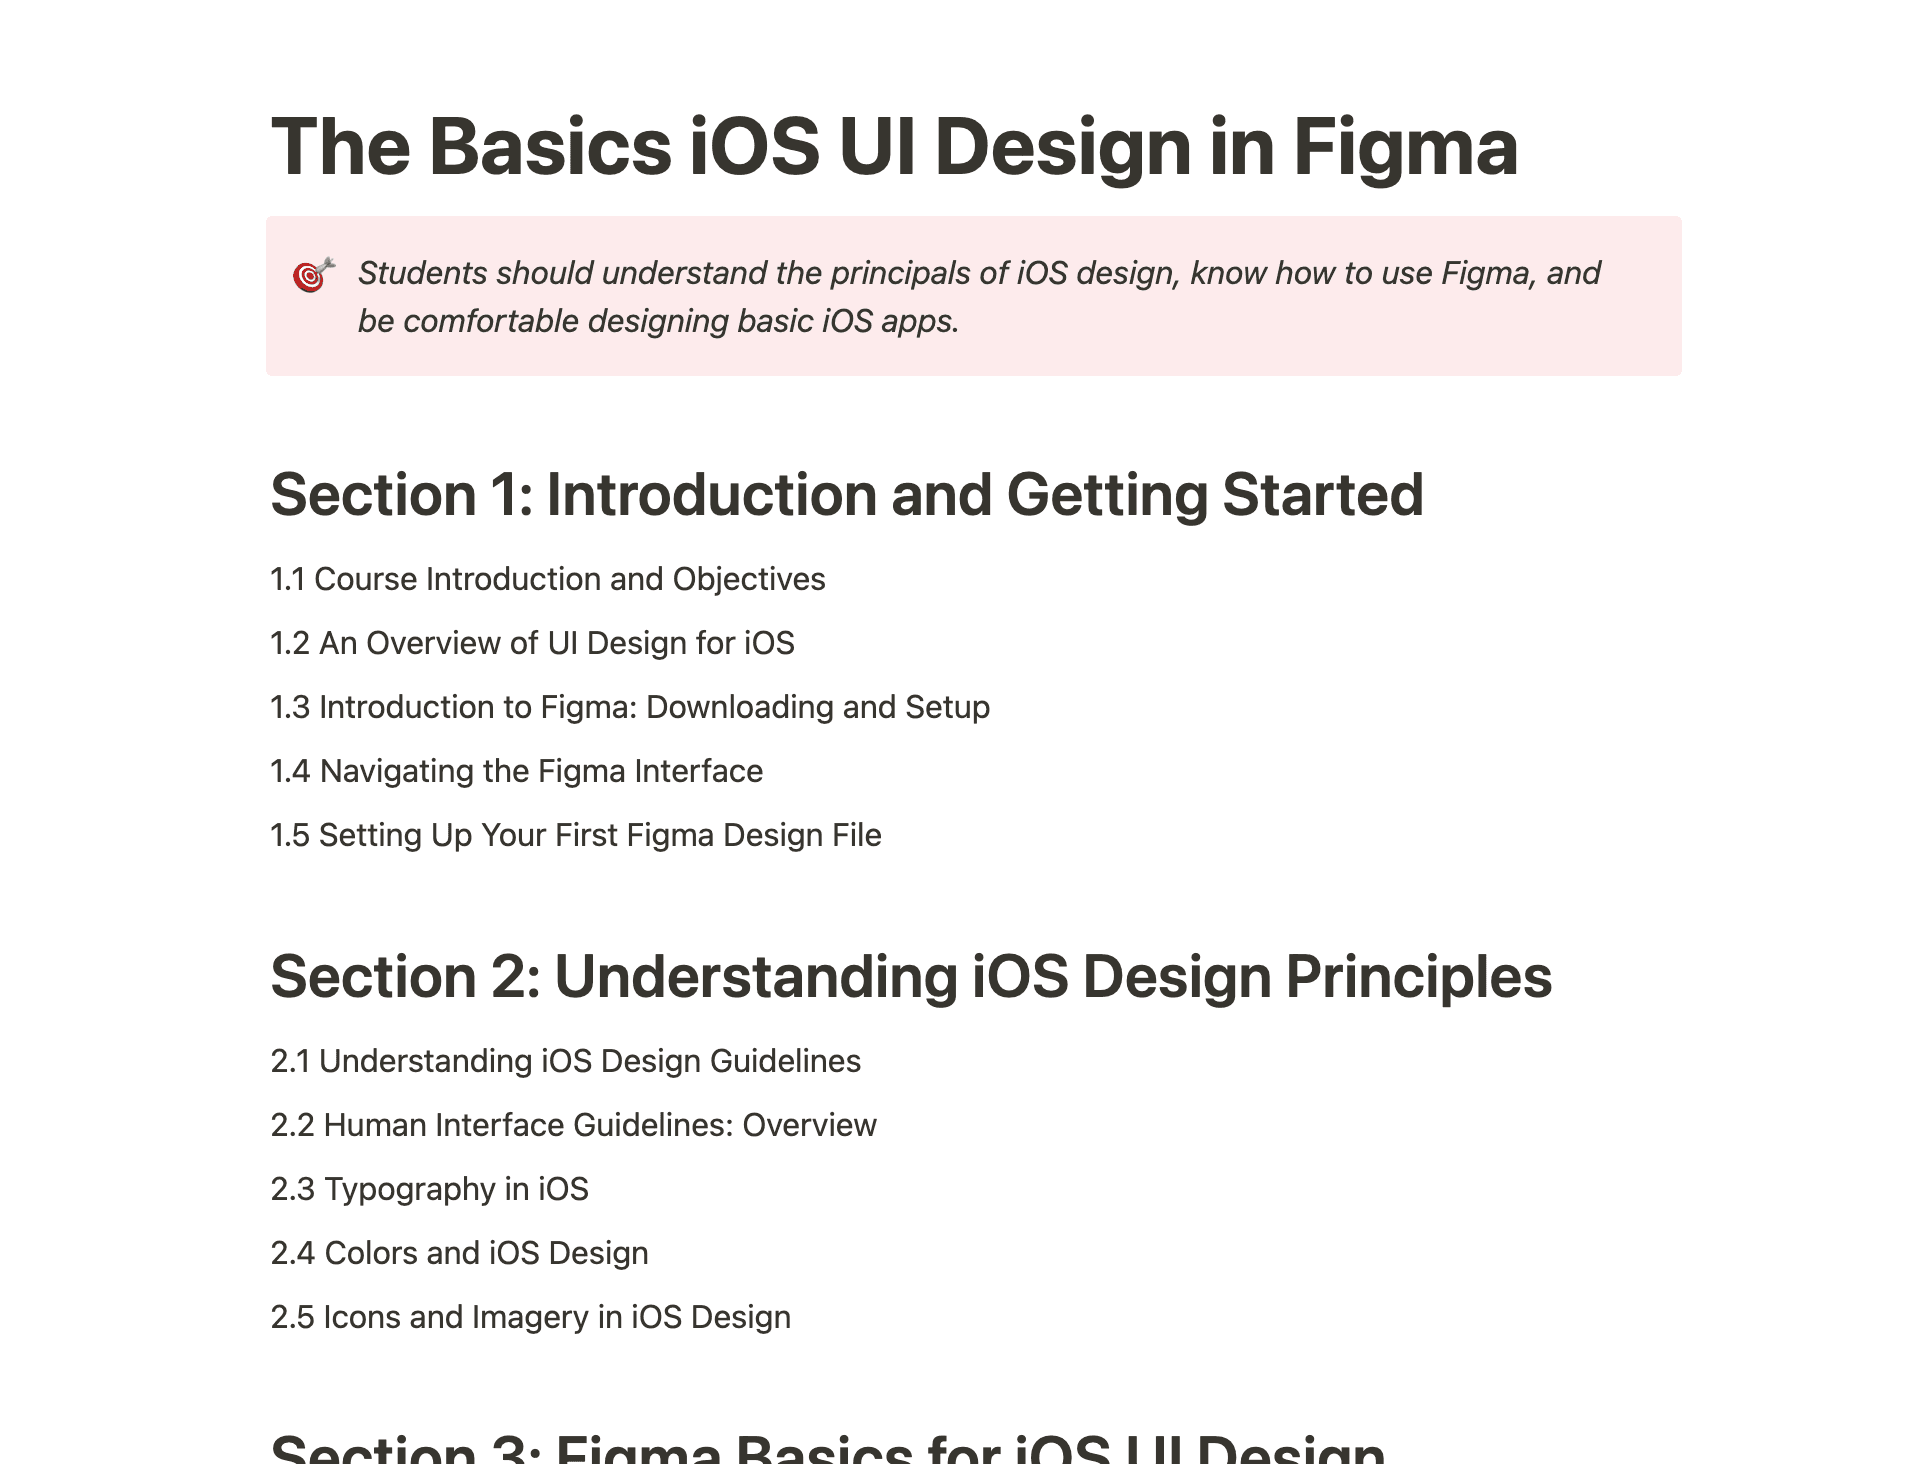
Start things off with the goal you want your students to reach by the end of the course. In this case, we want them to be comfortable creating basic iOS apps. You can see how the structure of the sections and lessons below support that overall goal.
Then offer a course introduction and some foundational concepts that will be a basis for more advanced topics later in the course, like designing an iOS app and dealing with responsive and adaptive design.
As you can see, this instructional design of a Figma course aligns with the structure that Circle relies on, which is:
Courses
Sections
Lessons
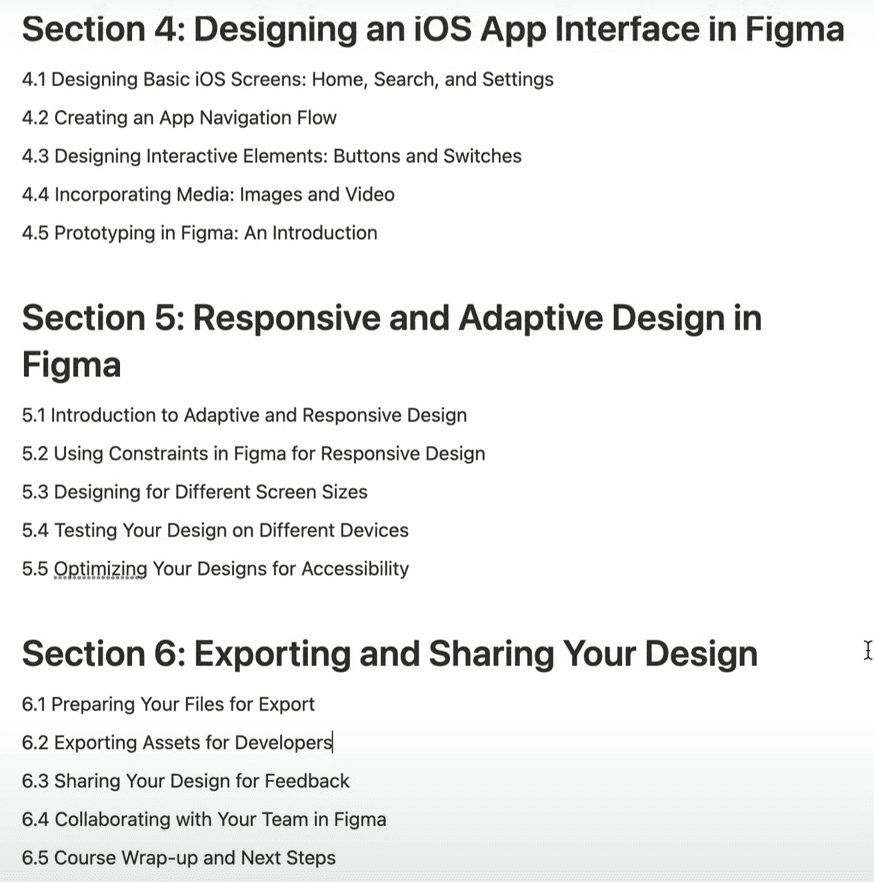
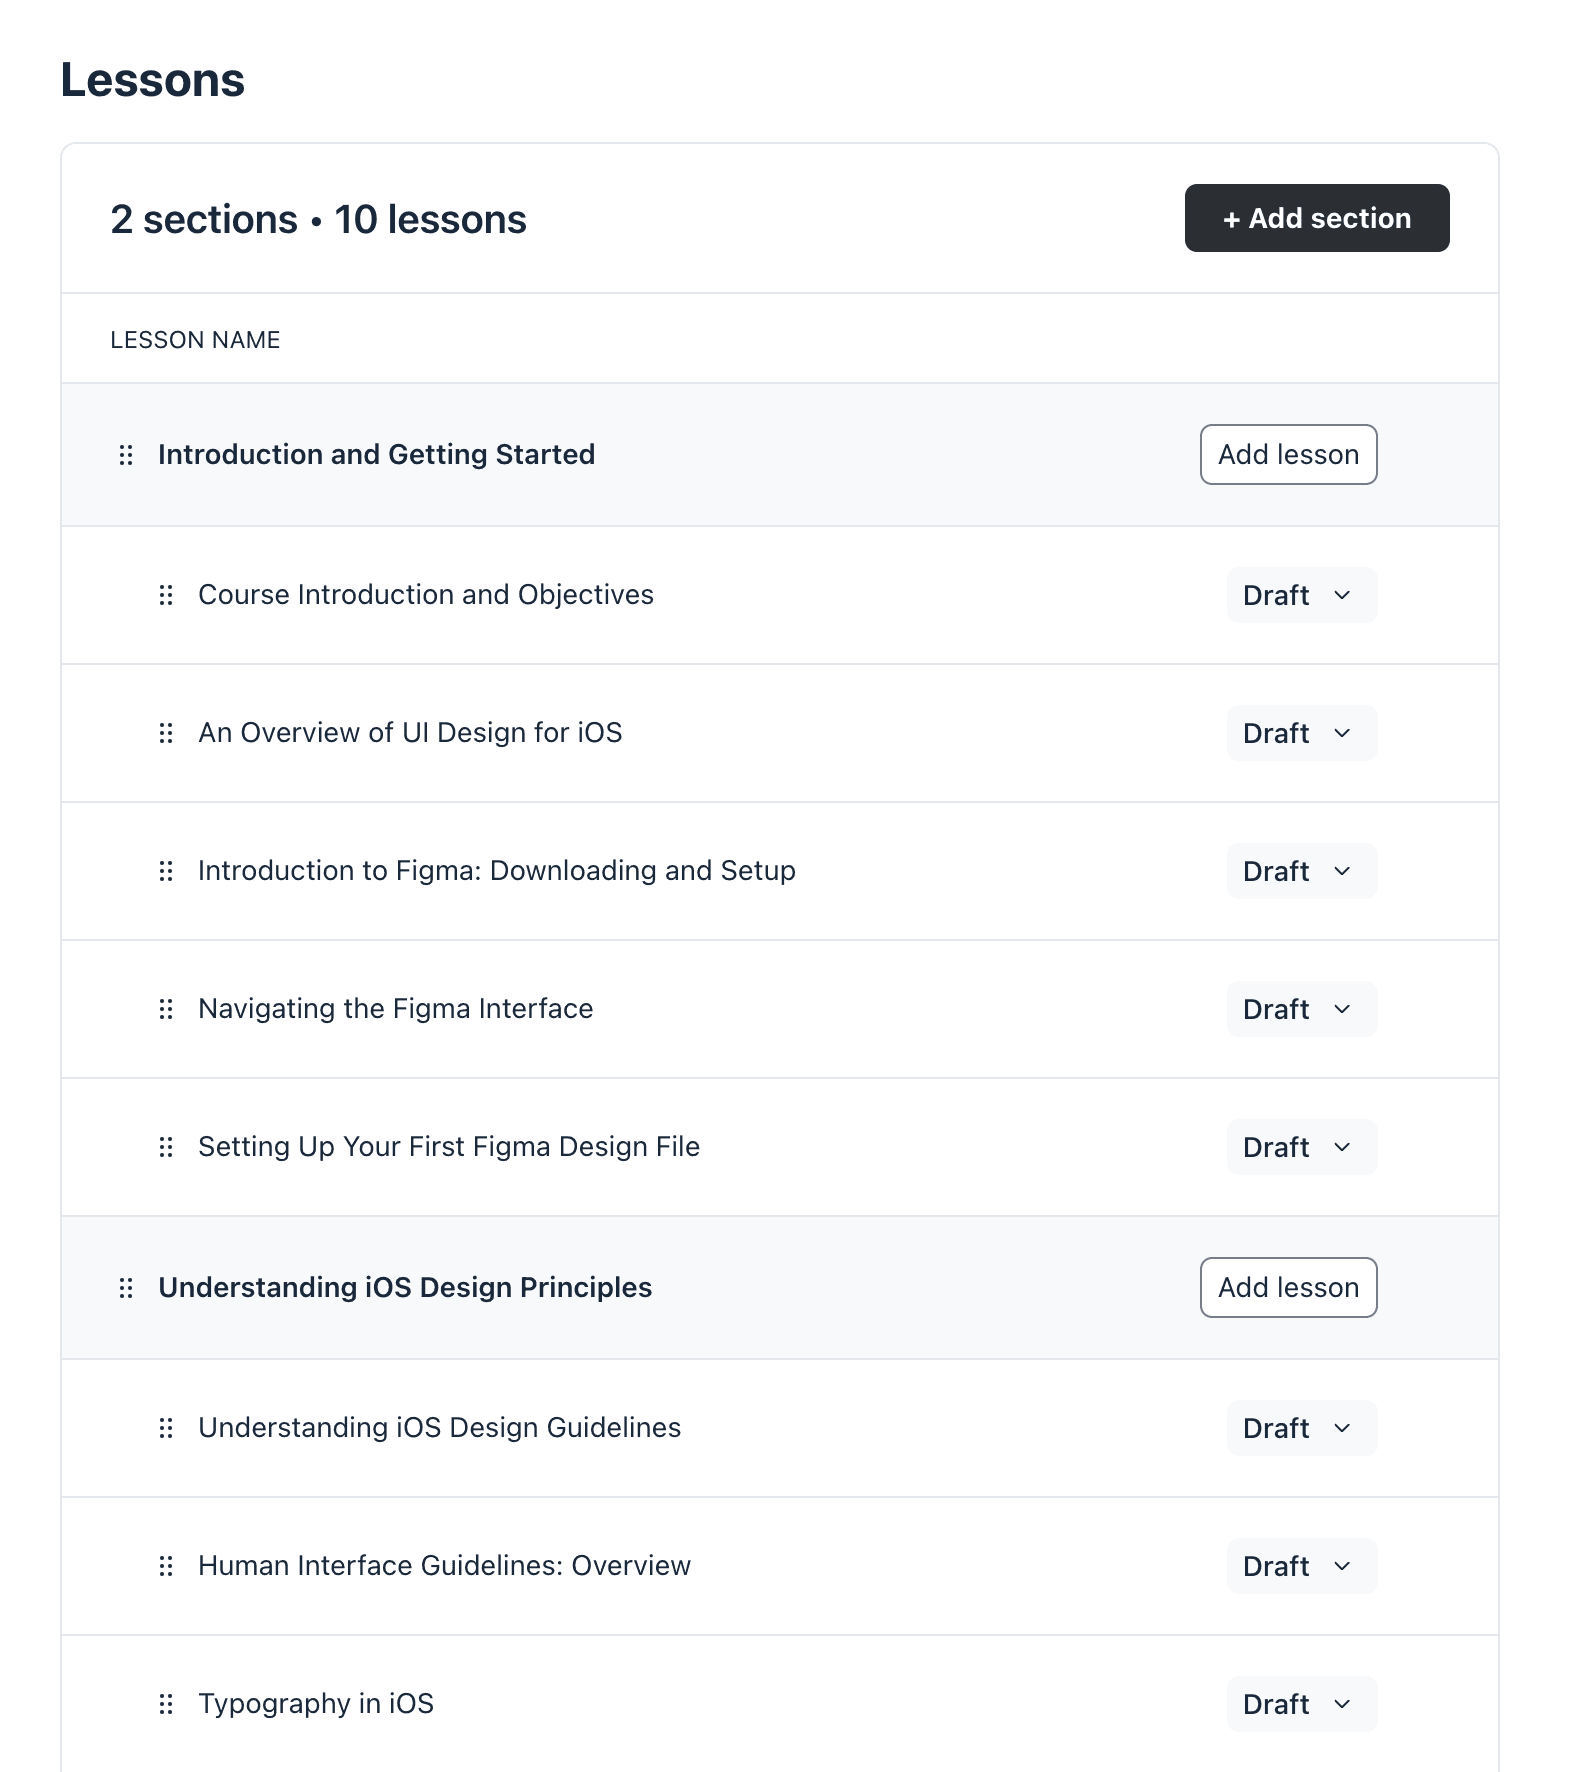
The Basics iOS Design UI Design in Figma is our course, which is organized into sections, like ‘Section 1: Introduction and Getting Started’. Within each section is a list of lessons, such as ‘Setting Up Your First Figma Design File.’ This instructional design offers a clear roadmap that helps us stay organized.
It’s wise to start your course with an introductory lesson that outlines its structure and discusses your goals and objectives. This will help your students clearly understand how the course will unfold and focus on the goal or objectives they’ll be working towards.
You should also make sure to conclude your course with a wrap-up lesson. Use this opportunity to highlight the next steps you want them to take, push them to the next course, or summarize everything they’ve learnt in the course so far.
Content
Now that you have a grasp on how to structure your plan, it's time to shift your focus to the content itself. This is where you write your script, prepare your slides and work on any demos you want to add to the course.
The actual content you create depends on the specifics of your course. However, for our example course, we have a script and slides.
As you can see below, we’ve written out a script for our first lesson. It has two aspects: the script, which will be read aloud, and the bullet points, which will be incorporated into our presentation.
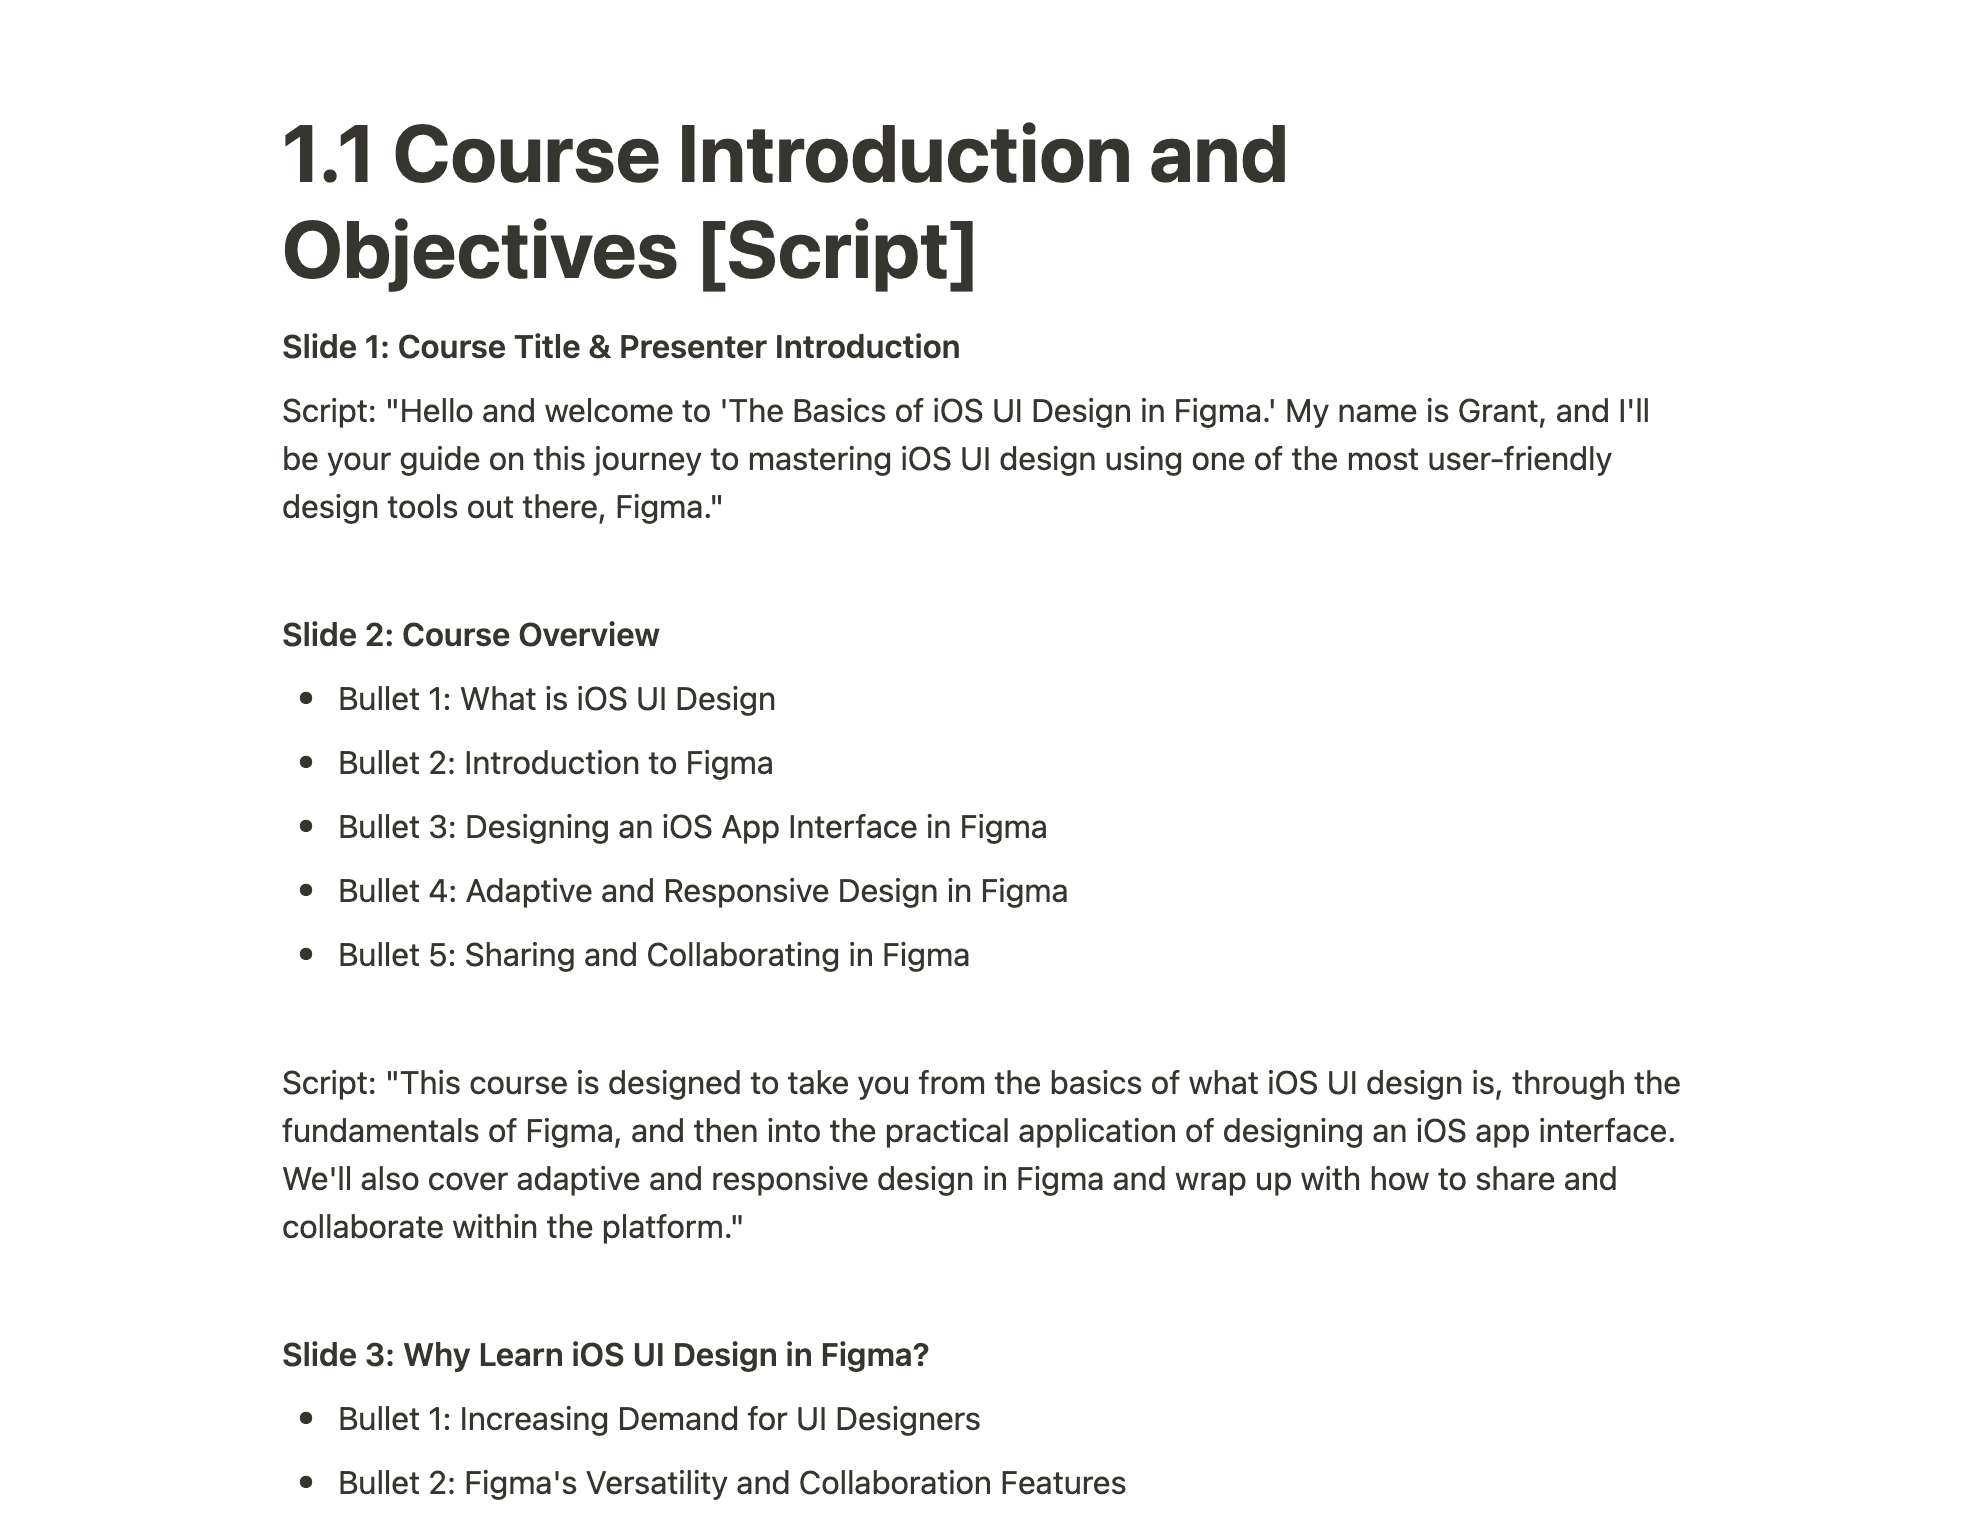
This helps create cohesion between what your viewers will see on the slides and what you’ll be saying. You don’t need to go into this amount of detail when writing a script if you don’t want to. However, the exercise of getting into this amount of detail will help you become more familiar and confident with your content.
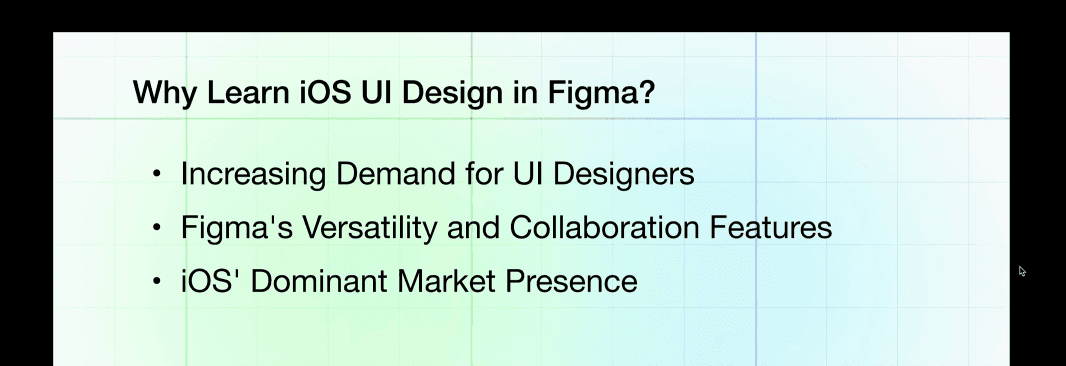
Now, let's turn our focus to the slides. For the slides in our presentation, we’ve designed them using Figma. Feel free to use the tool you’re most comfortable with to create your presentation, whether that’s PowerPoint, Canva, Google Slides, etc. The most important thing is to choose a tool that helps you get your ideas out as efficiently as possible.
Now that we have our content, it’s time to move on to recording the video.
Record
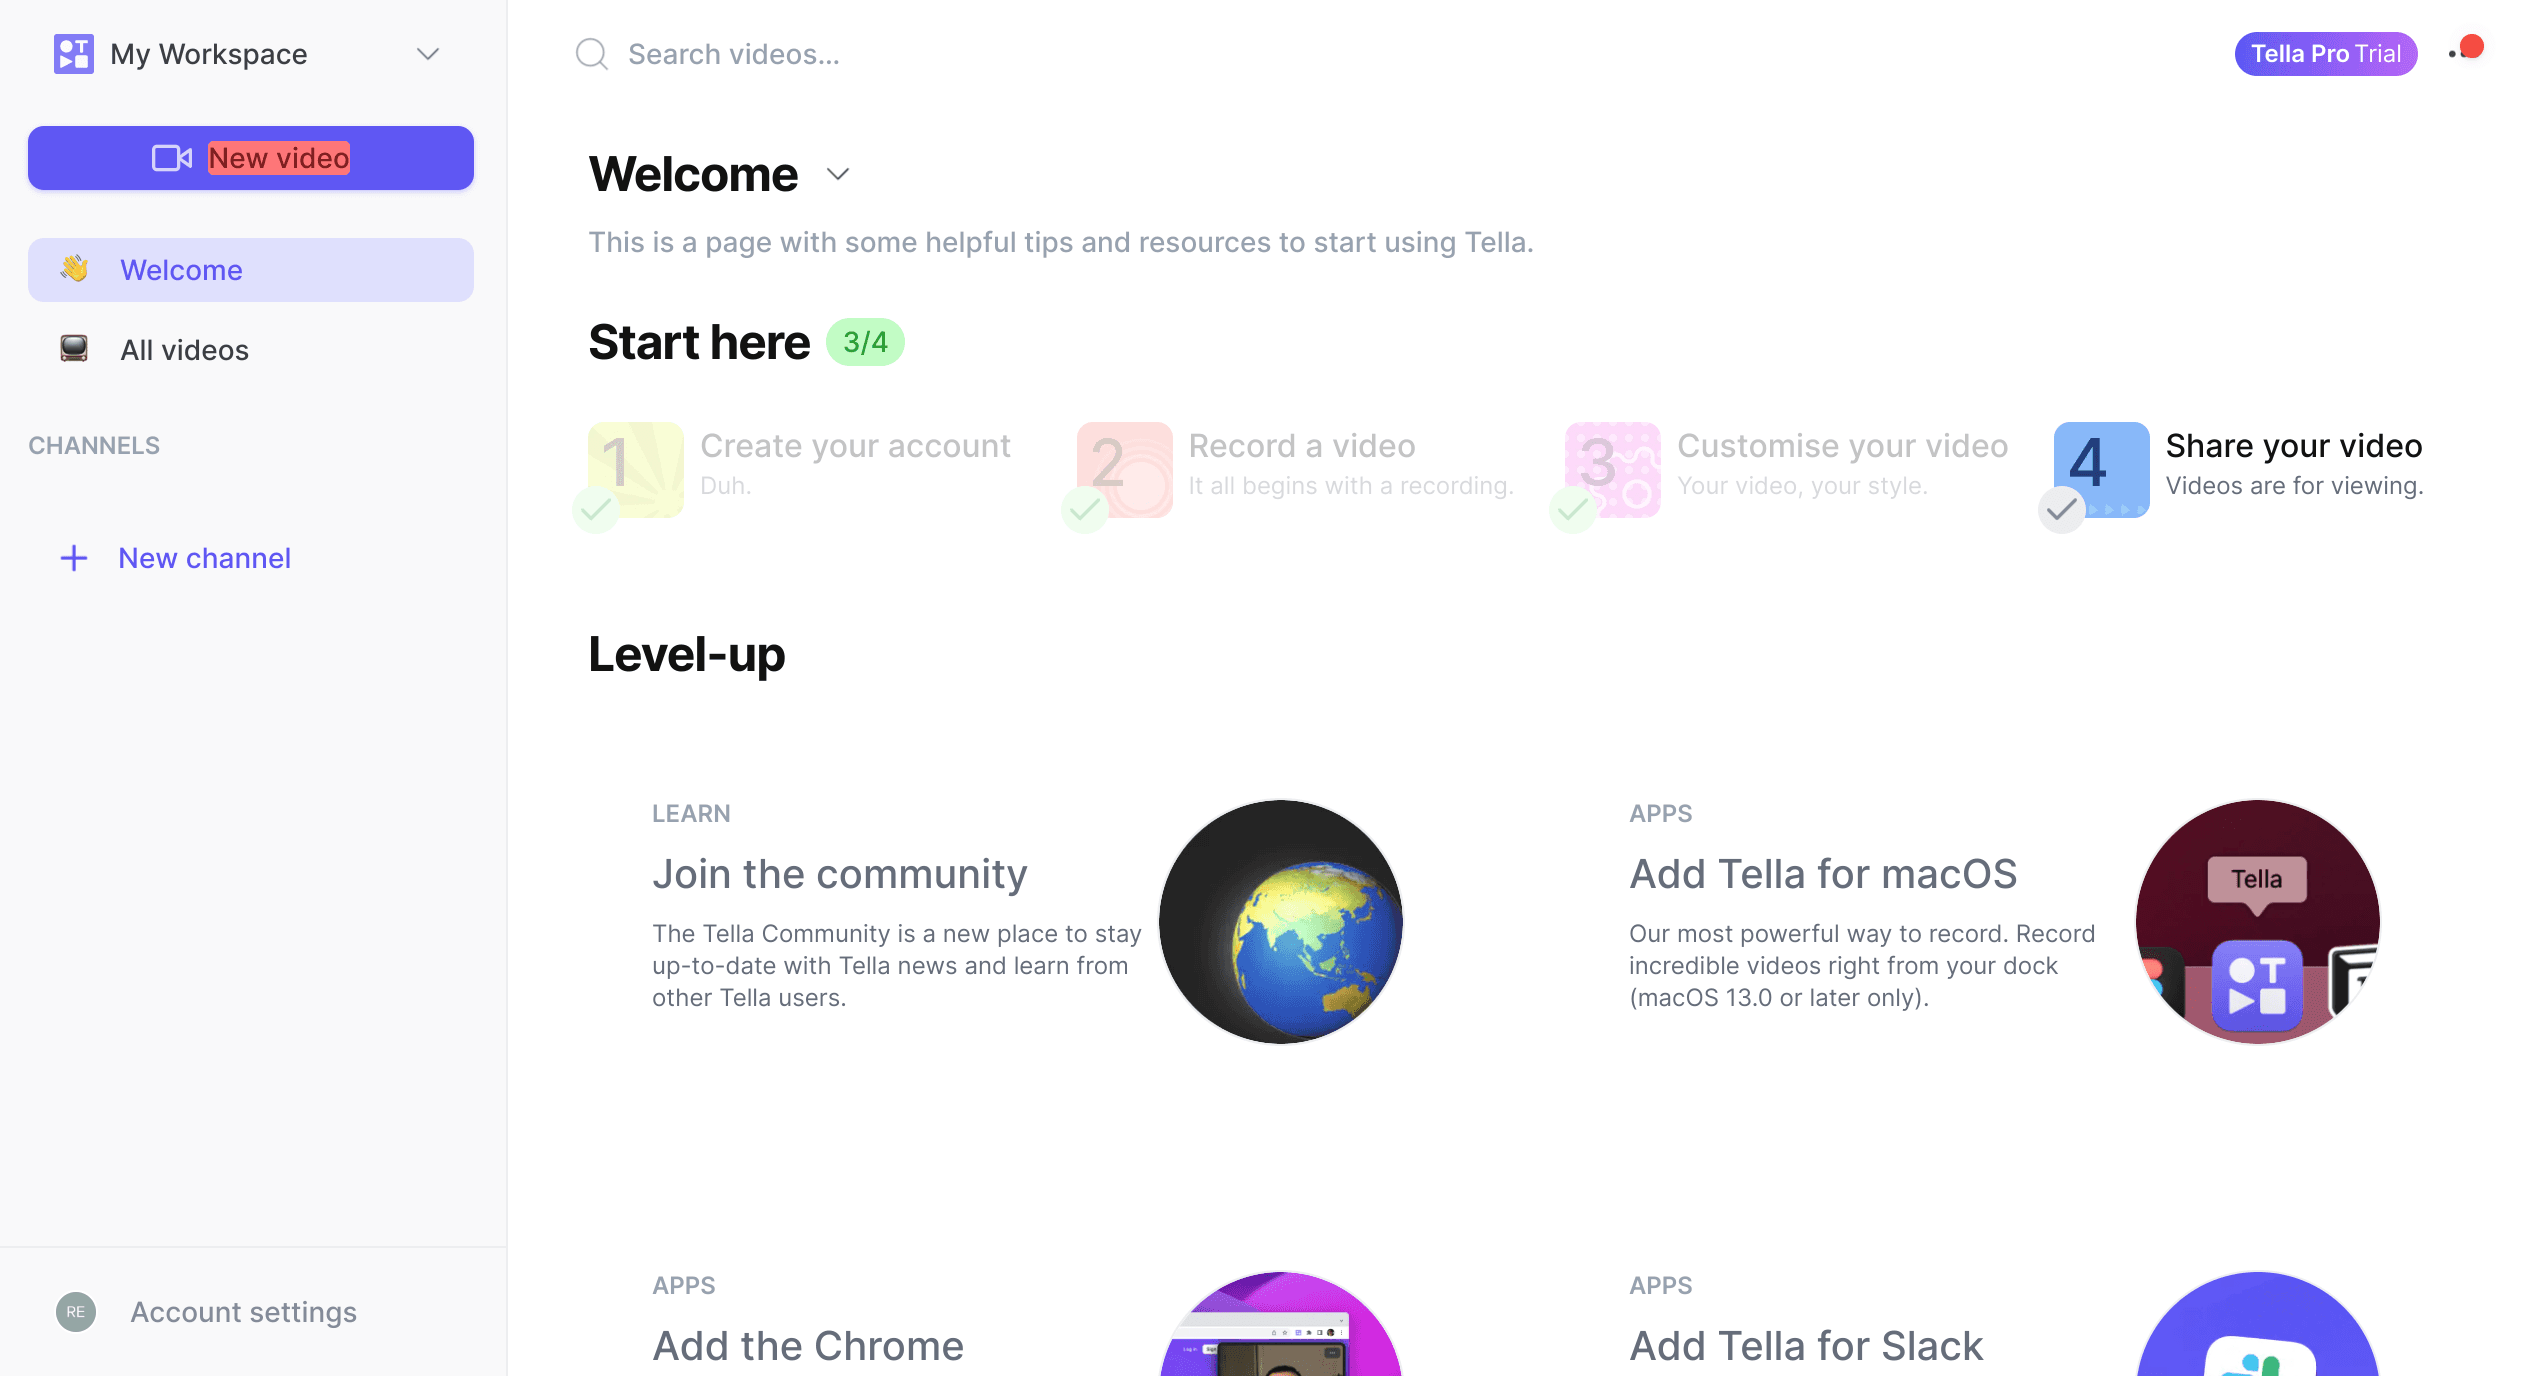
Bring all the previous steps together to record videos for your course. For our course, we’ve used Tella, a screen recorder for creators. It’s simple to use, with tools and workflows designed for things like creating courses. Once you’ve created a Tella account, hit ‘New video’ in the top left-hand corner of your workspace.
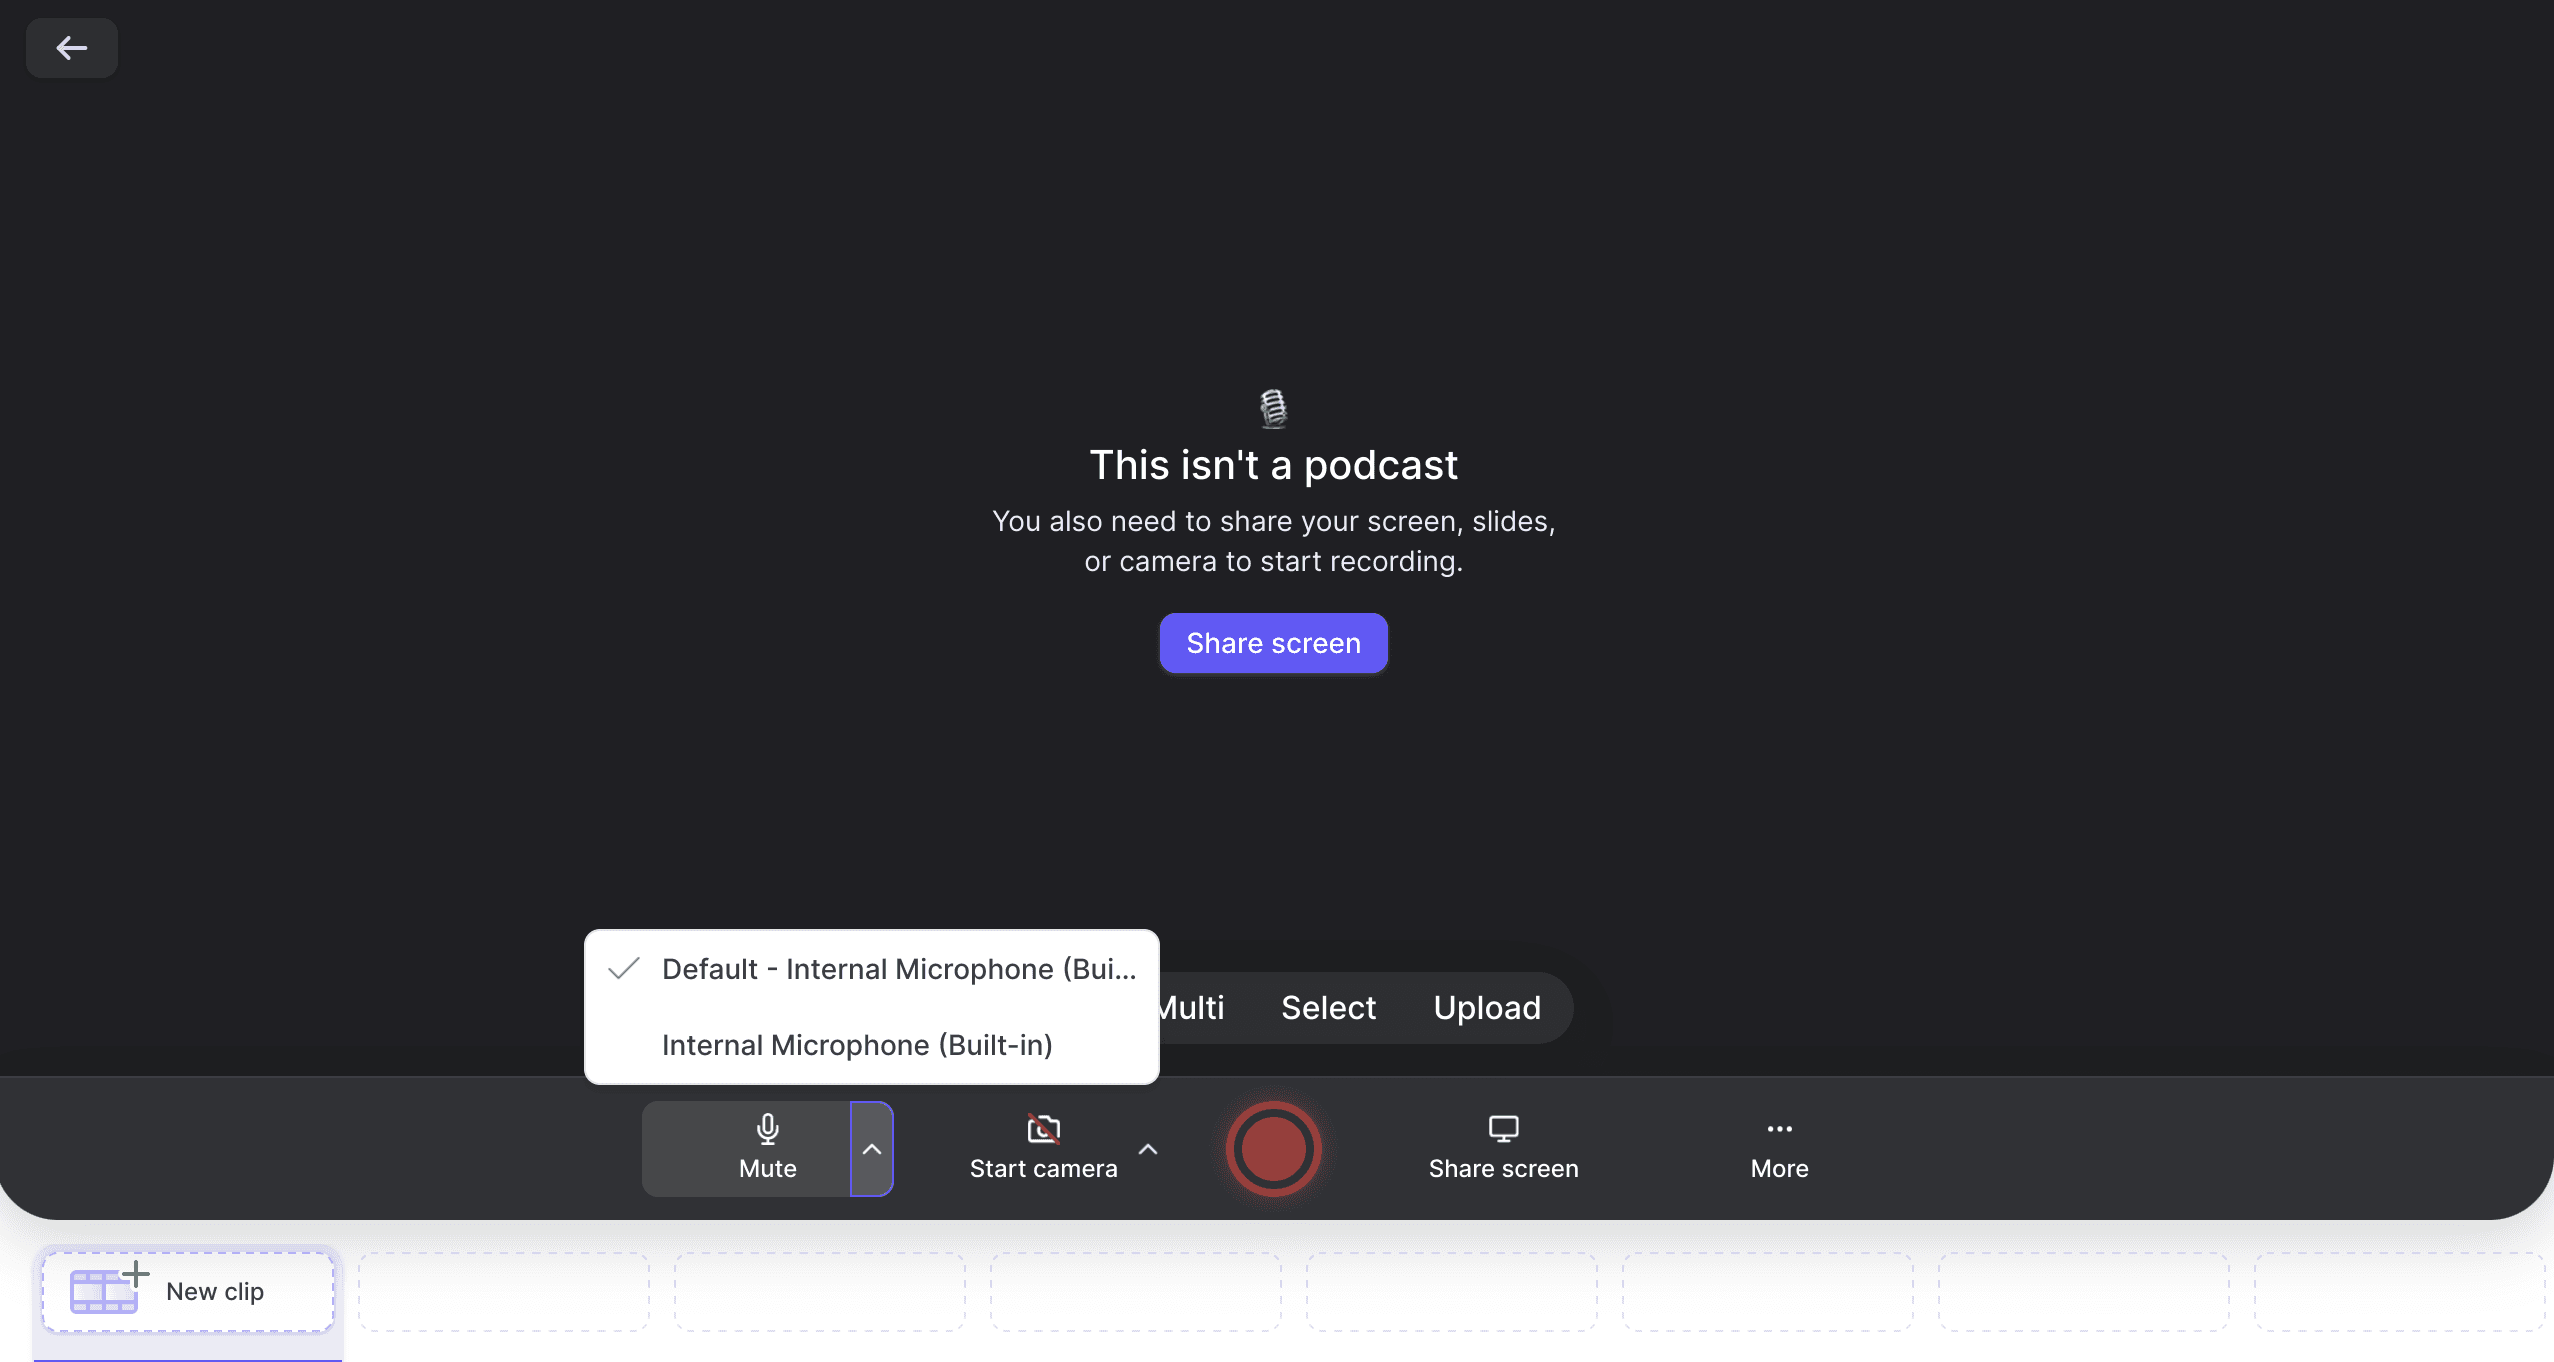
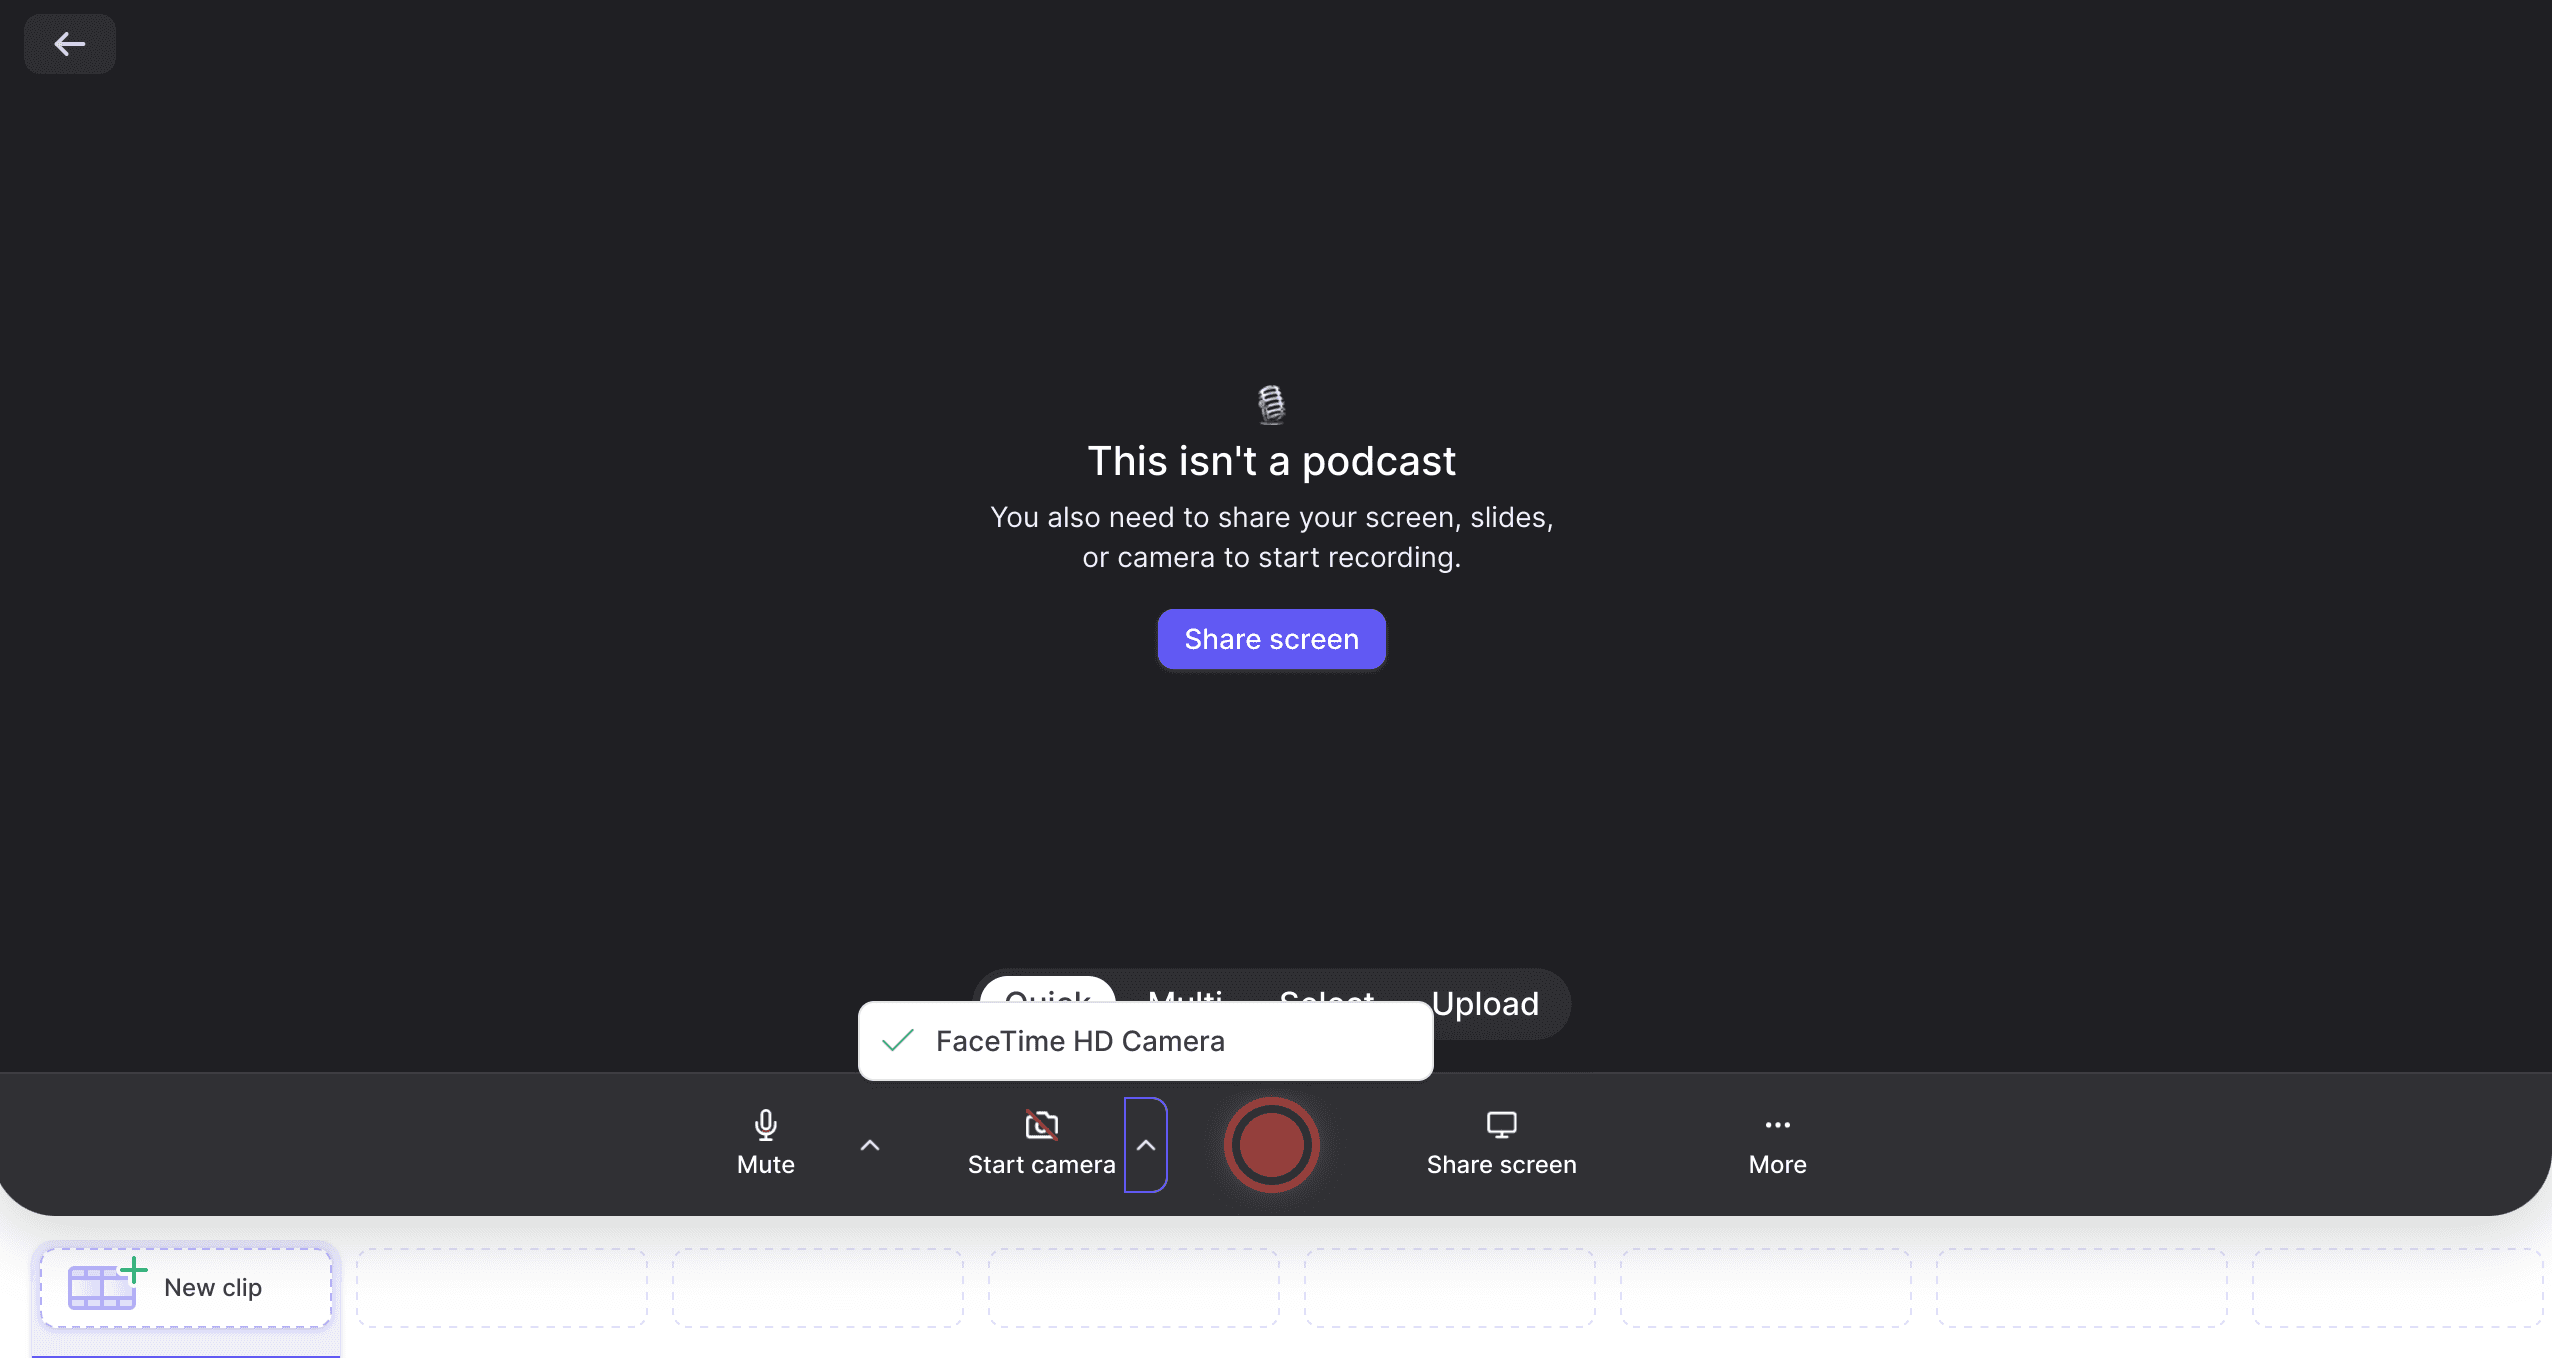
Then you’ll need to connect your camera and microphone. You can do that via the menu at the bottom of your screen. Simply click the arrow beside ‘Stop Camera’ to select your camera, and click the arrow beside ‘Mute’ to select your microphone.
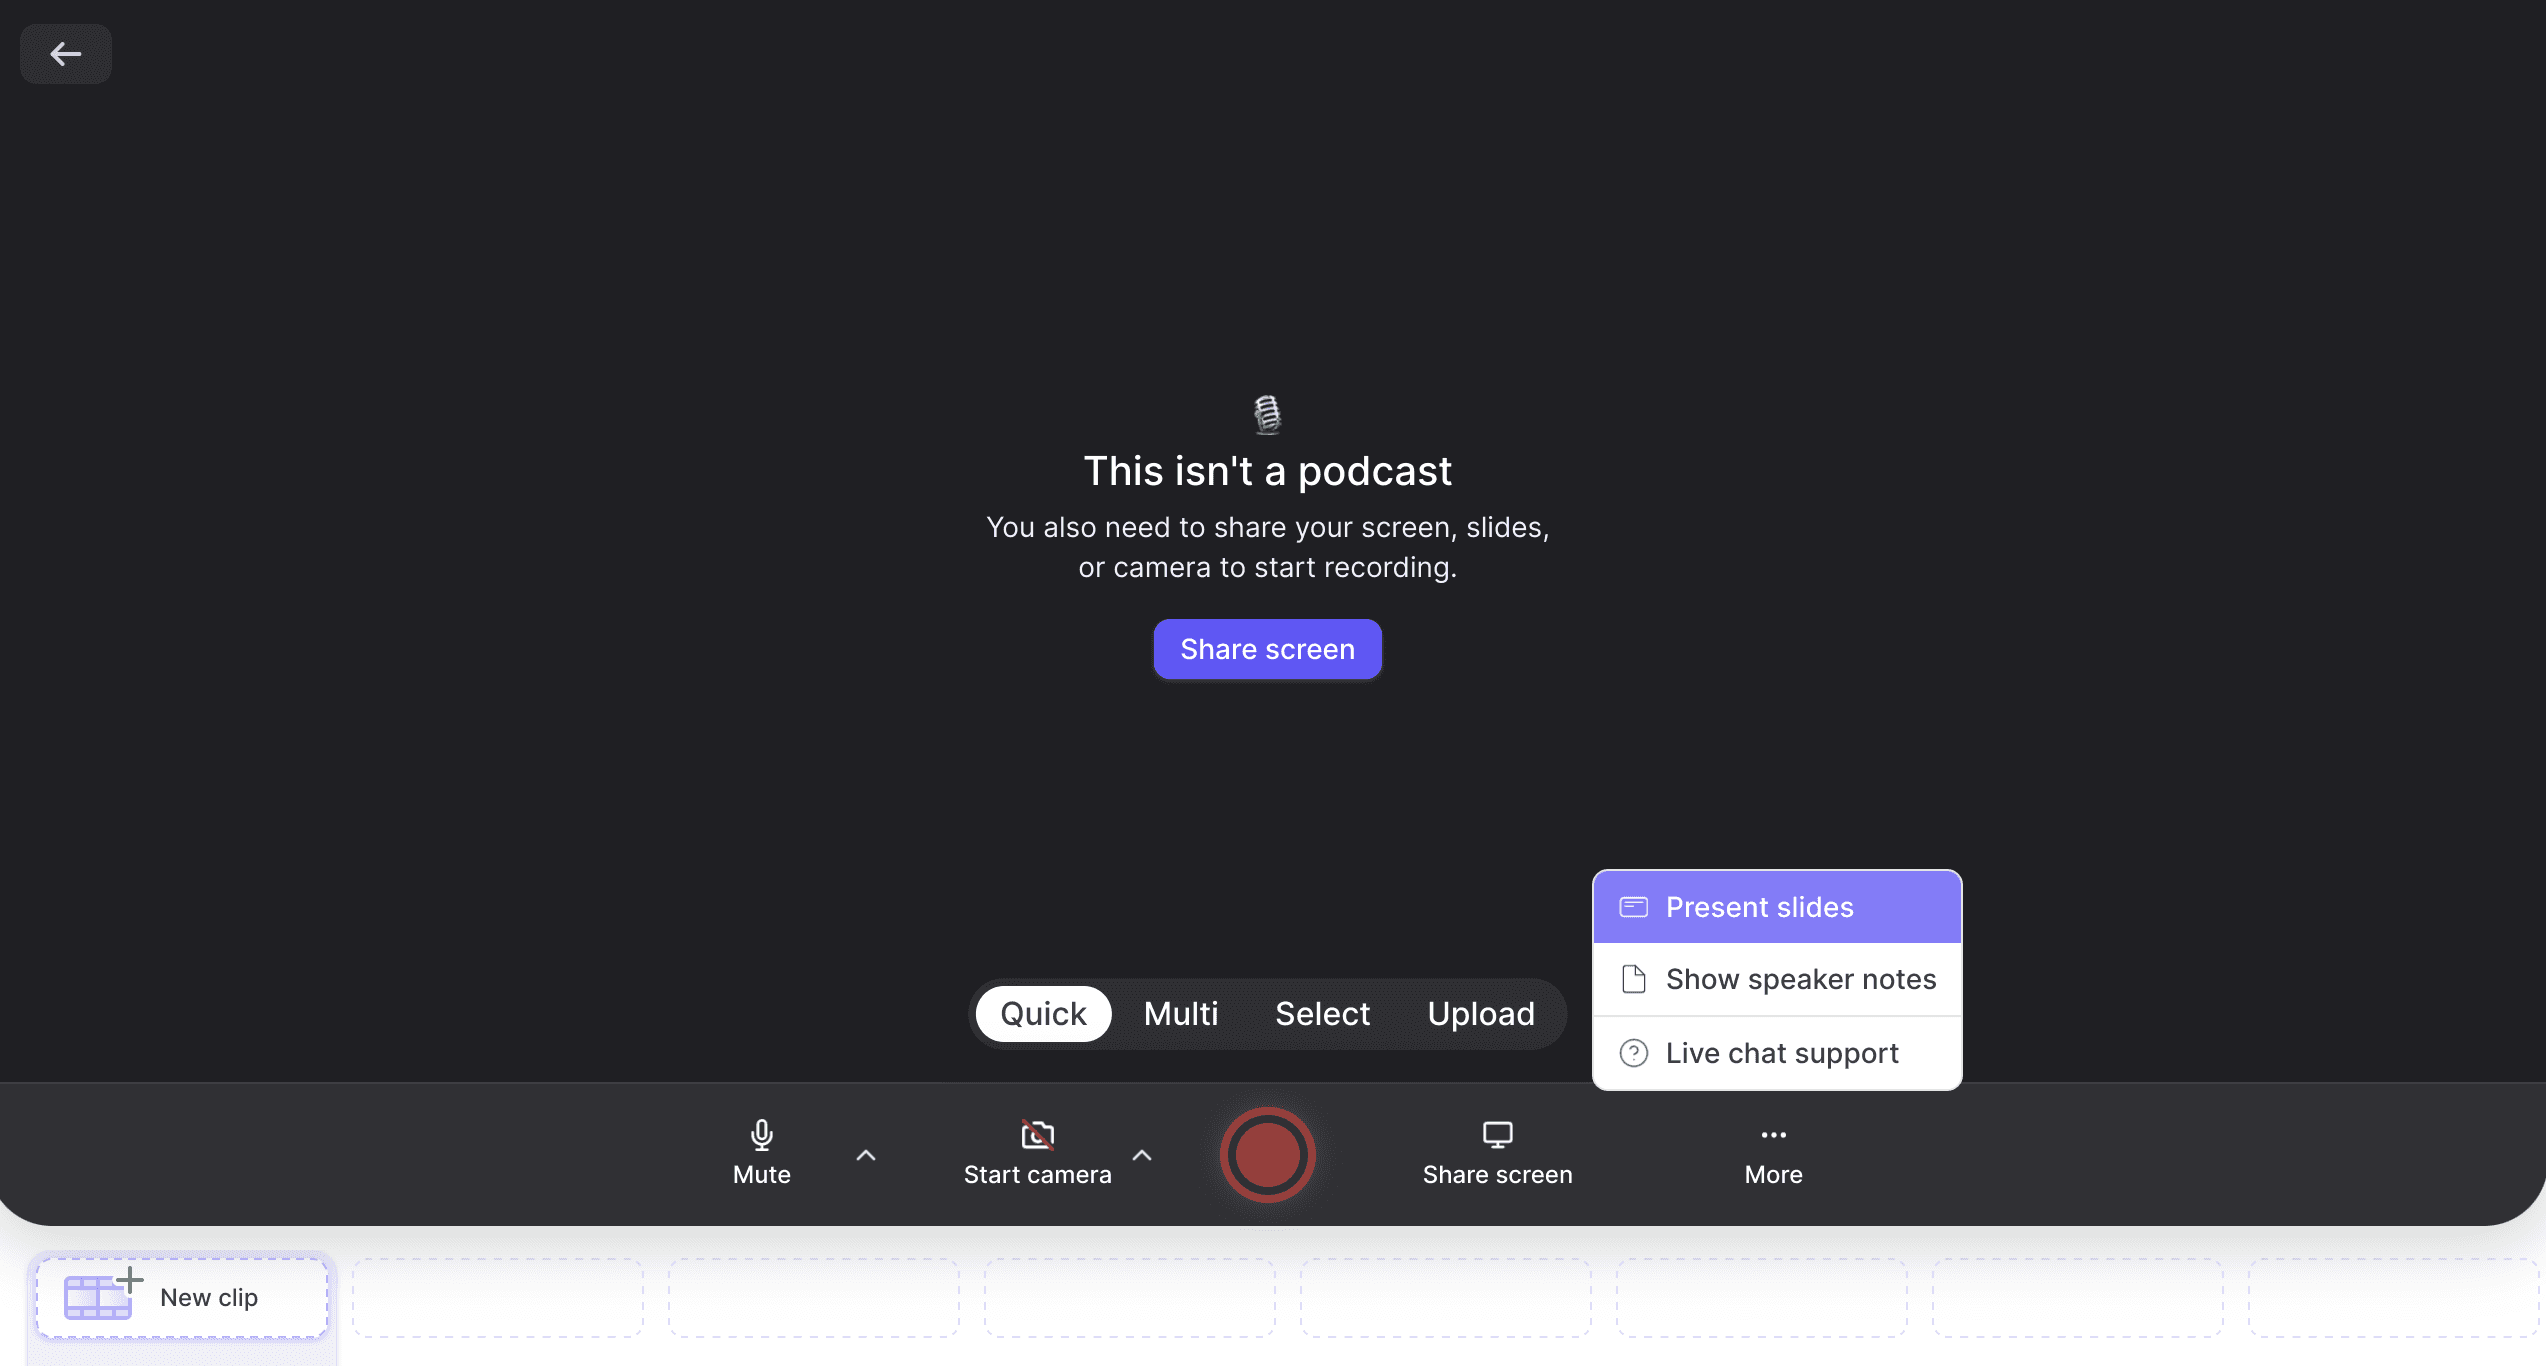
Next, you need to import your slides. To do that, click ‘More’ and ‘Present slides,’ then choose how to import your slides. Tella imports many different presentation formats, like PowerPoint, Keynote, PDF, images and more.
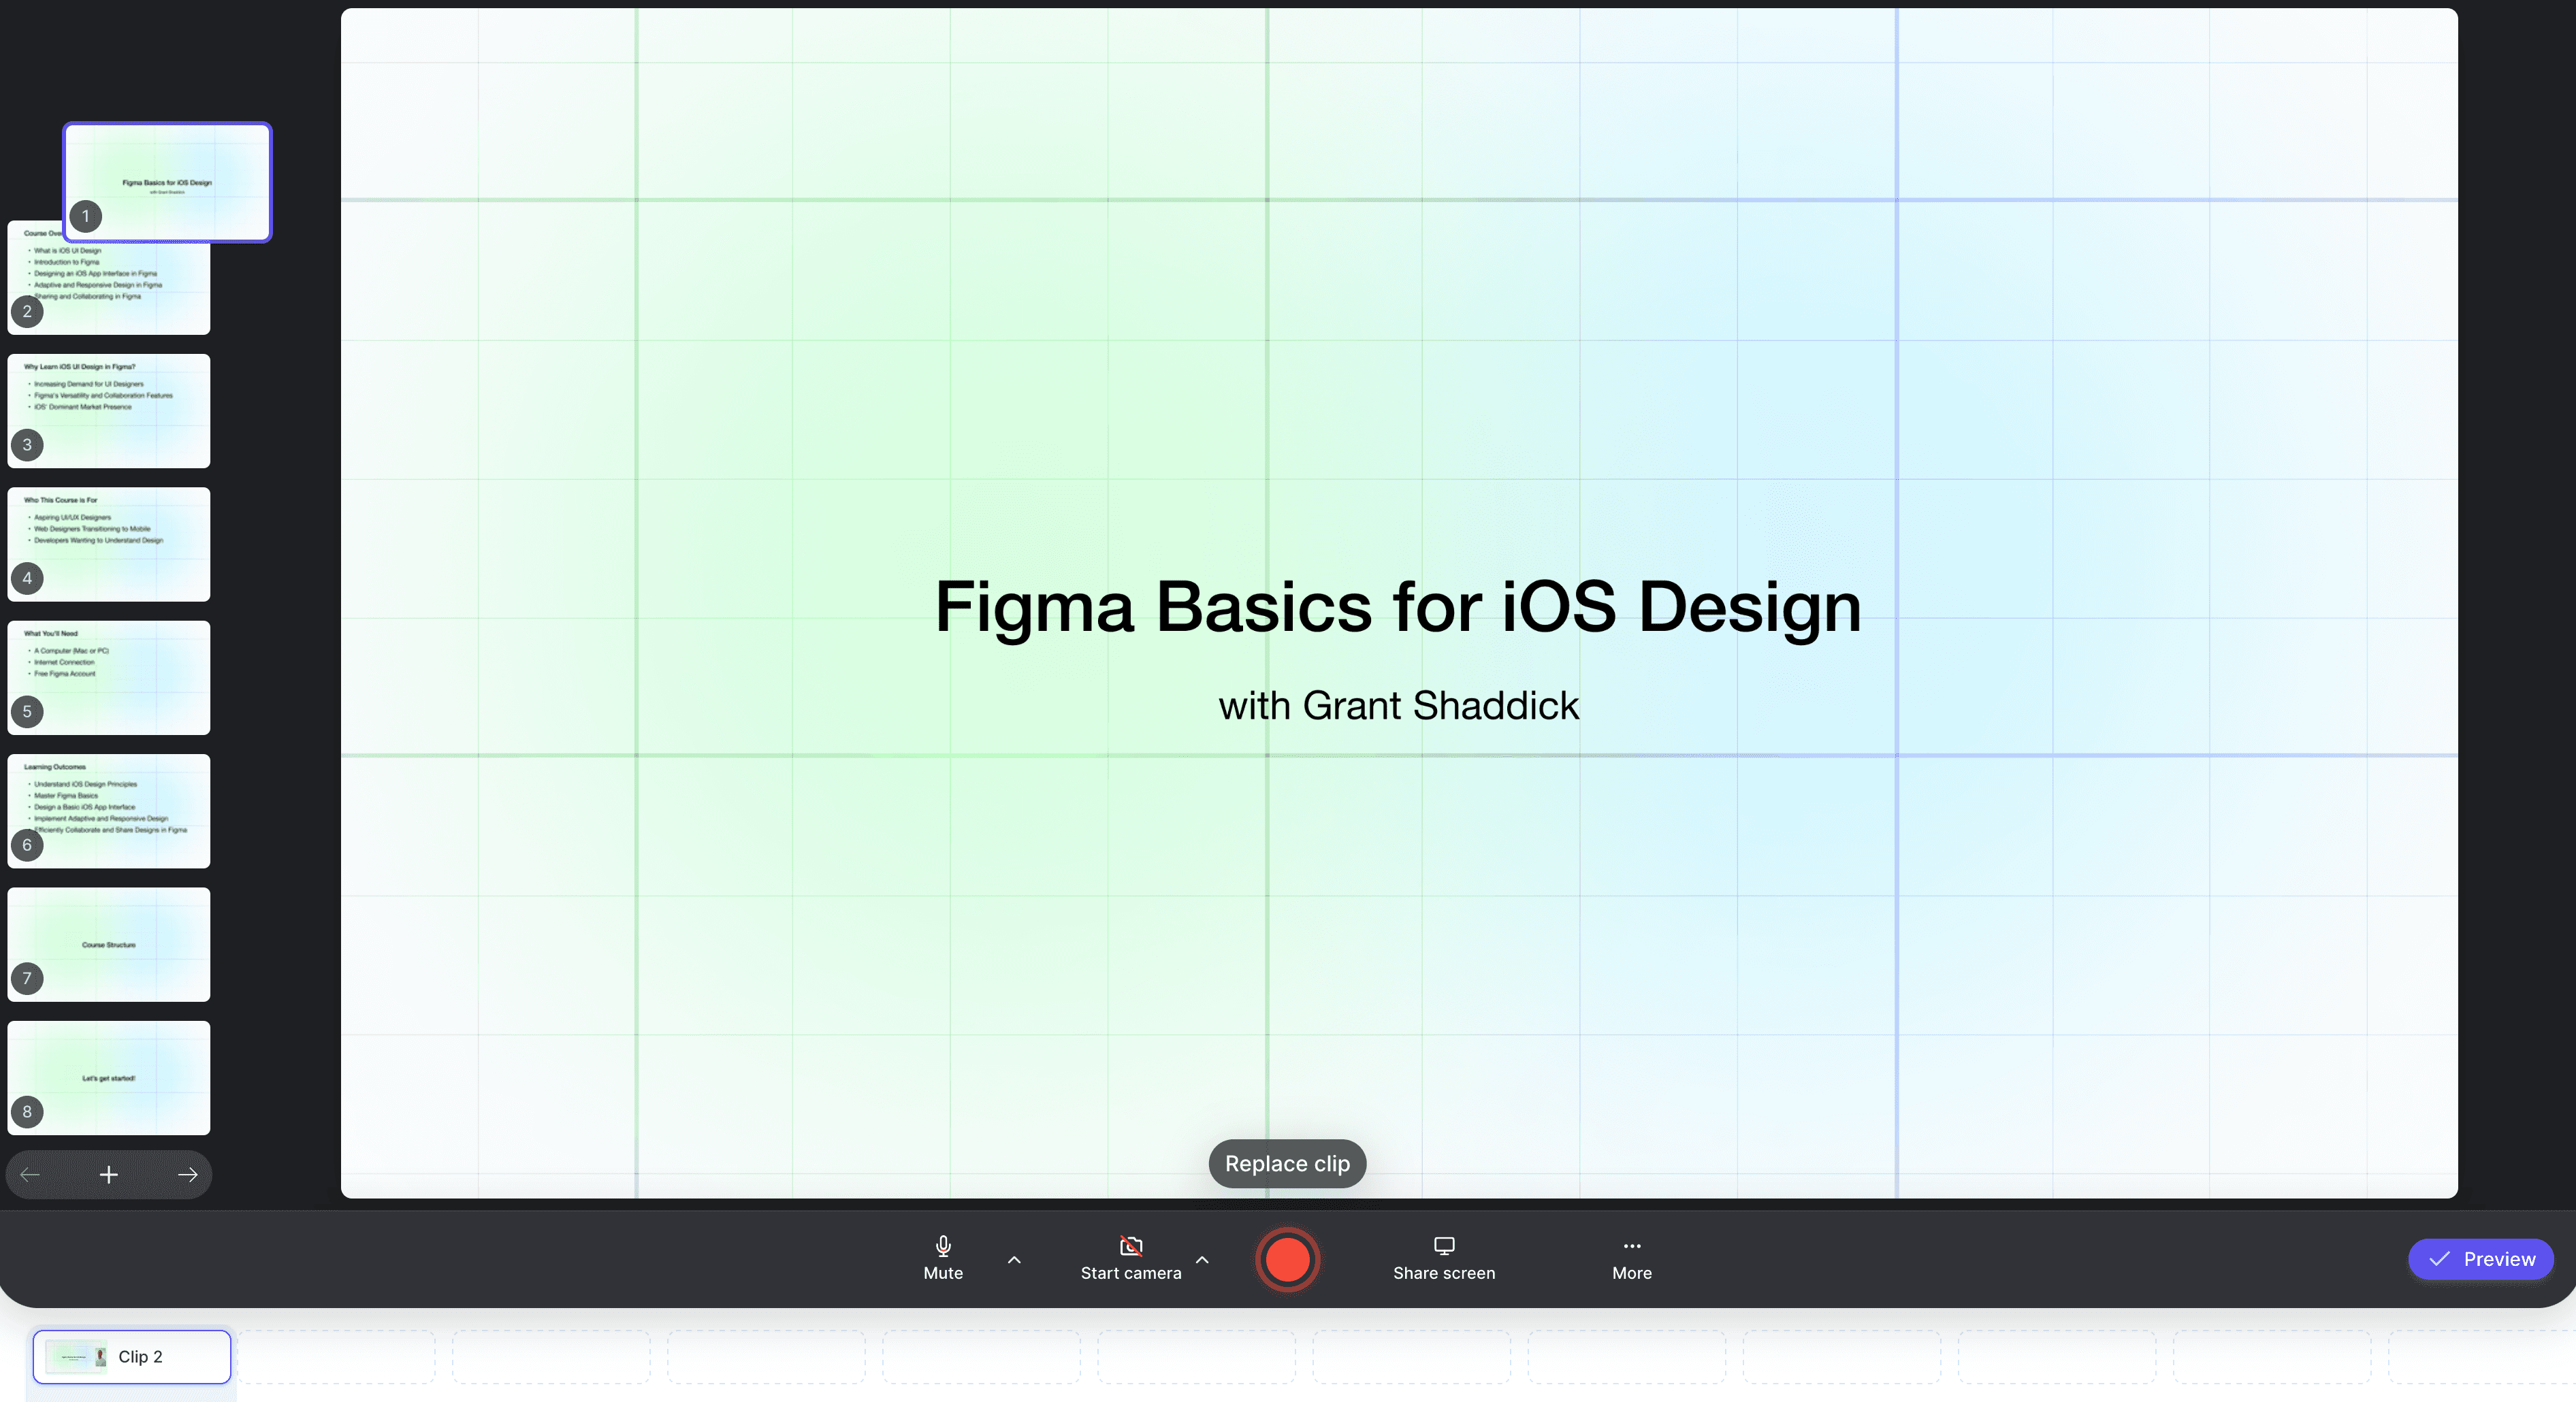
Once your slides are imported, you can easily preview them by clicking on the centre of your presentation. Or, you can click and drag to rearrange your slides on the left-hand side of your screen.
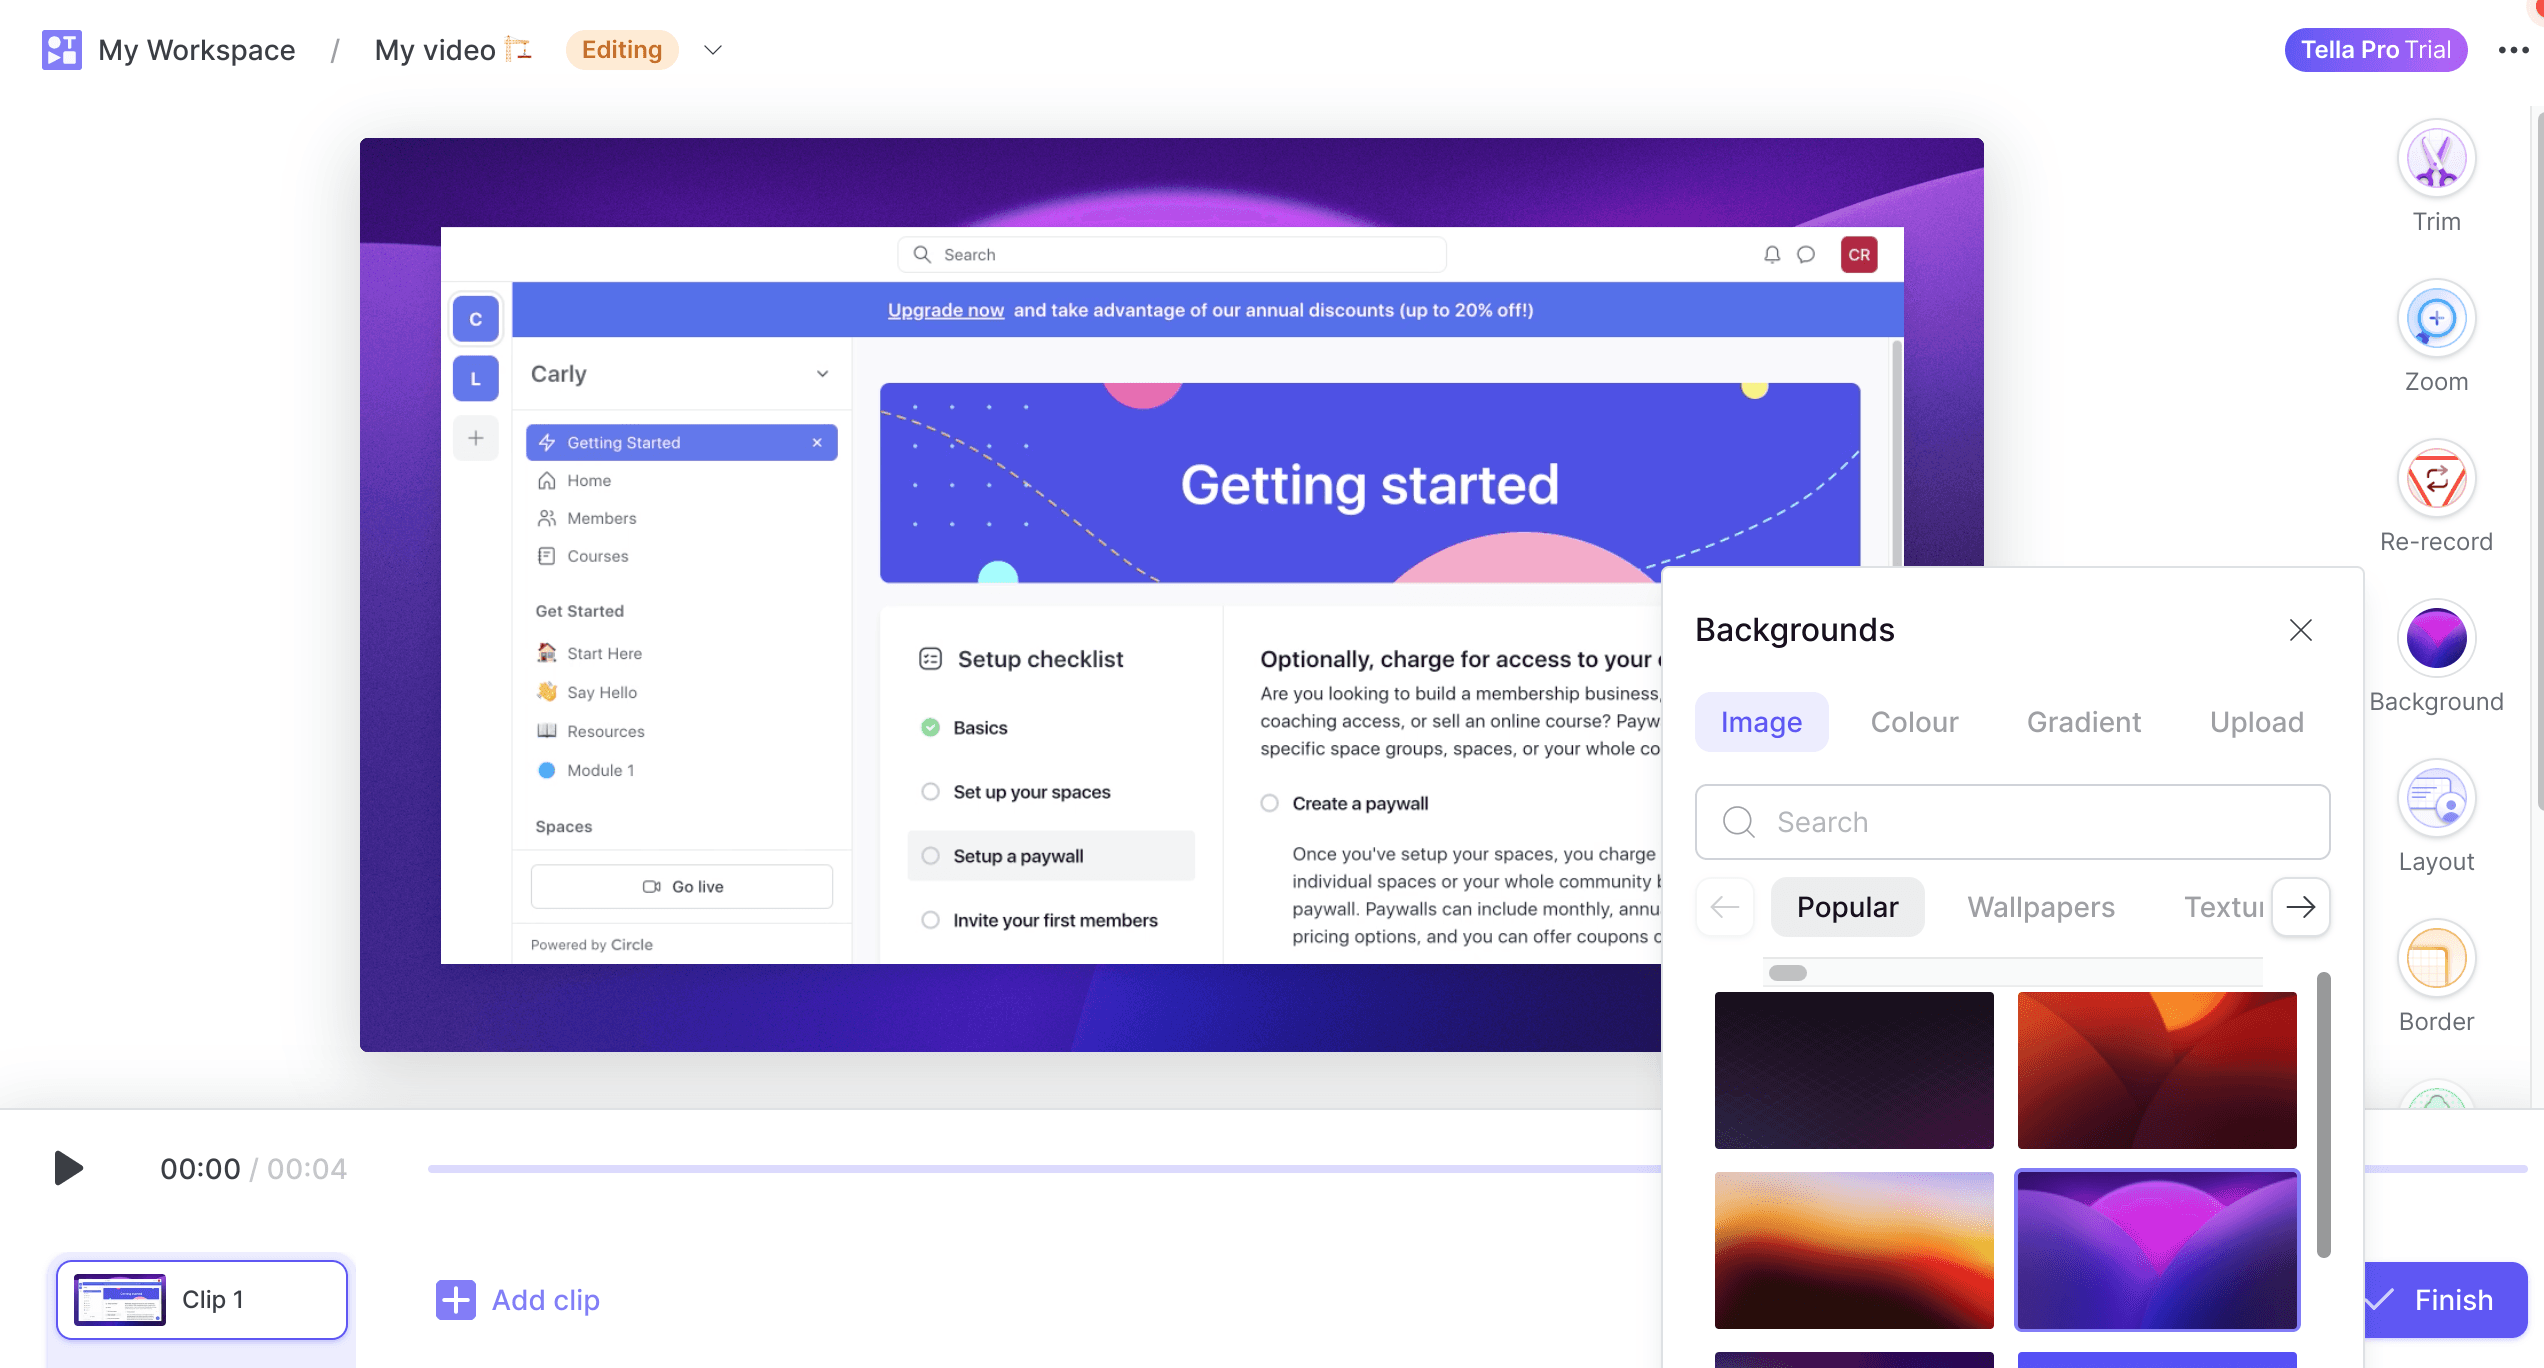
When you’re happy with your presentation, simply hit the big red button at the bottom of your screen to start recording. Once that’s done, you’ll be taken into Tella’s editor. Here there are a bunch of cool things that you can do to your video, like trim and split it. You can also re-record it if you need to, customize the background, and play around with different layouts.
When you’re done editing, hit ‘Finish’ in the bottom right-hand corner and then ‘Download.’ Now you want to export your file to upload it into Circle. For that, select ‘4K Resolution’ for the best visual quality and ‘Burned in Subtitles’ to get subtitles directly added to your video.
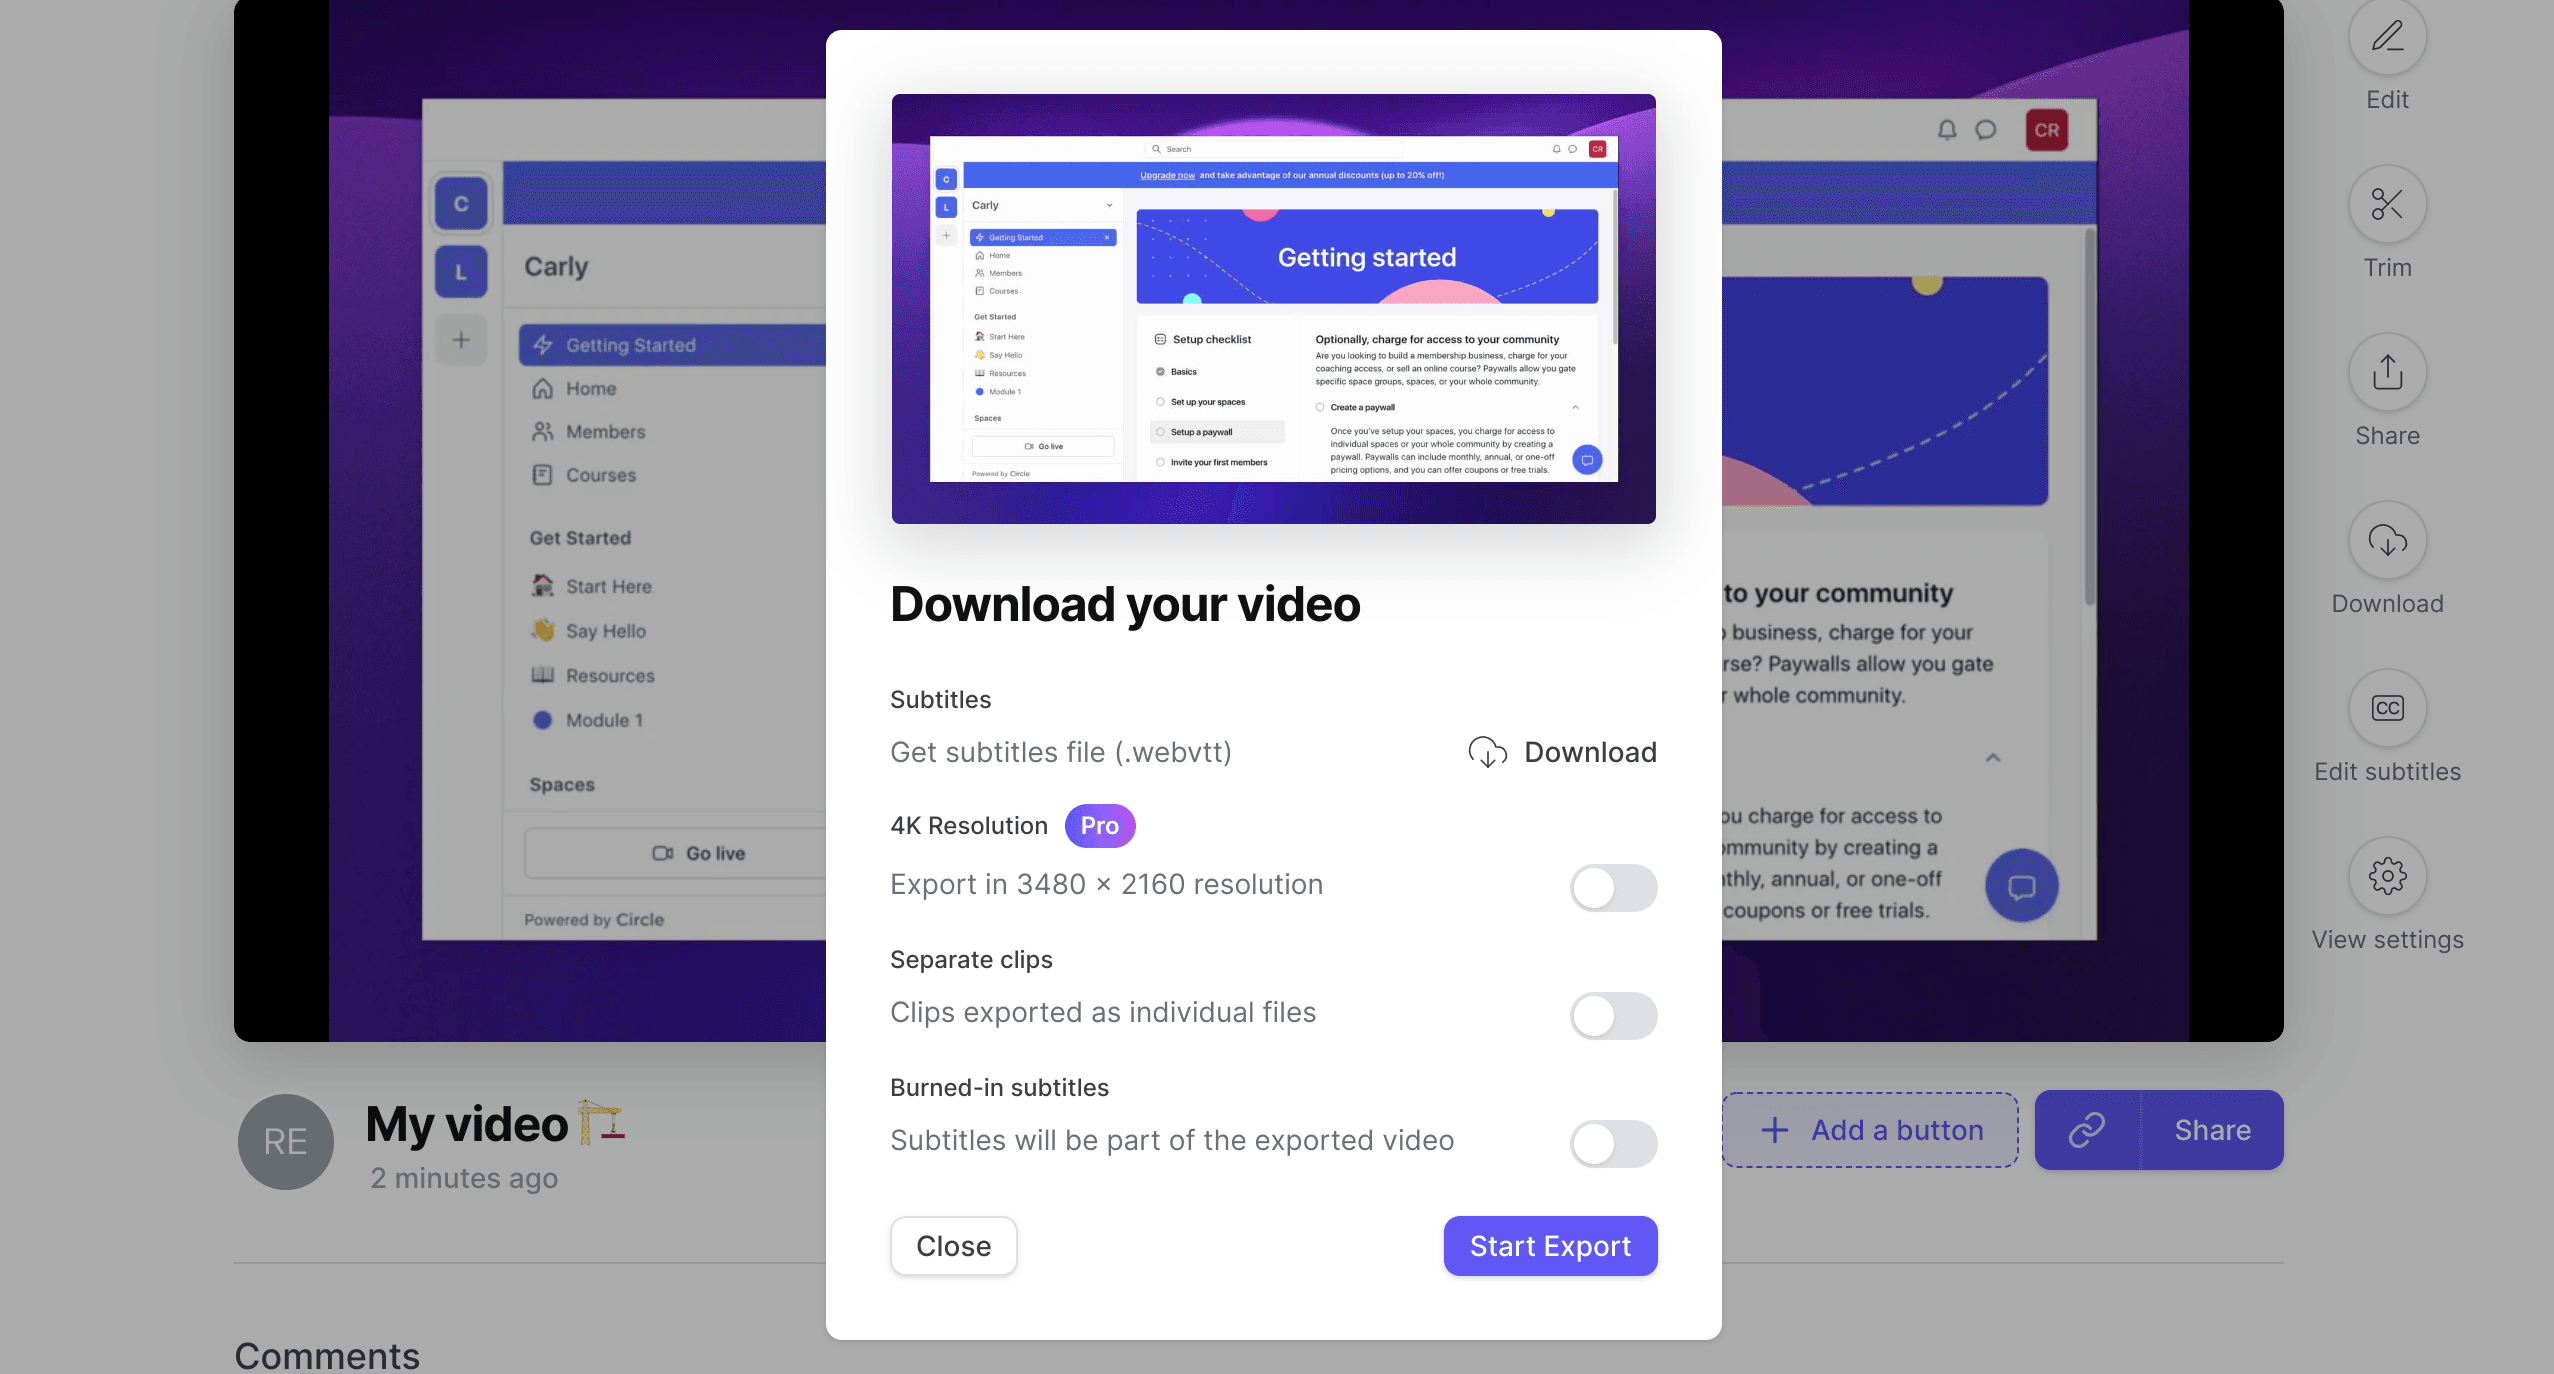
Tella transcribes everything you say automatically, so you don’t need to worry about adding any subtitles. You can also edit your subtitles if you see any mistakes by hitting ‘Edit subtitles’ on the right-hand side.
Once you’ve done that, click ‘Start Export,’ and you’re good to go. Now that we’ve been through all of the steps in our process and covered the TICR framework, we can jump back into Circle. It’s time to get our course hooked up so that we’re ready to publish it.
Implementing in Circle
When you’re back in Circle, change the name of one of the placeholder course titles to the title of your choice. For example, we’ve added our course name, ‘Figma Basics for iOS Design,’ to our dashboard, as you can see below.
Next, go into the lesson editor and map out the structure of your instructional design. As you can see below, we’ve added the instructional design we discussed earlier to our editor. The sections are all included, as well as all of the corresponding lessons.
Along with including the instructional design, it’s also time to upload your content. We’ve gone ahead and uploaded the video we recorded in Tella to one of our lessons and added some extra content below it. We’ve also added a link to Figma so that students can get familiar with the product.
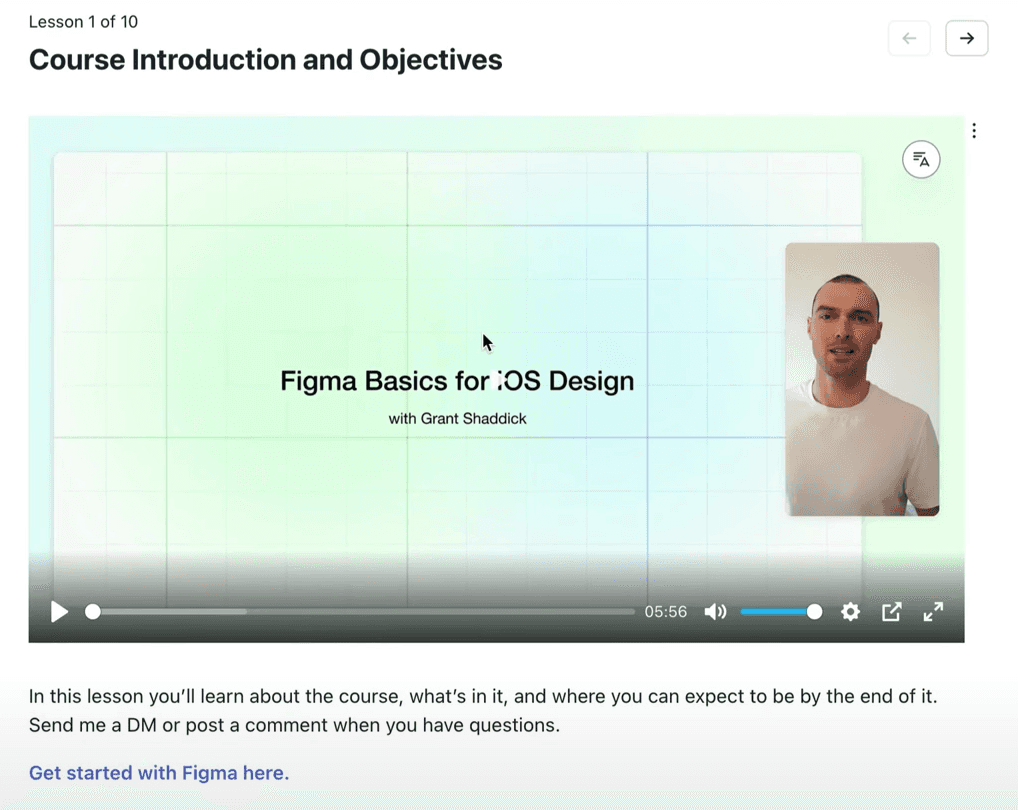
That’s one of the benefits of this section here - you can add relevant content to support the lesson.
You also have a few settings on the left-hand side of your screen. You can choose whether you want to publish your lesson if you want to have the featured media visible or not. For the most part, you will want to select this so that you can showcase your video. You also have the option to enable comments so that students can interact with you while they’re working on your course.
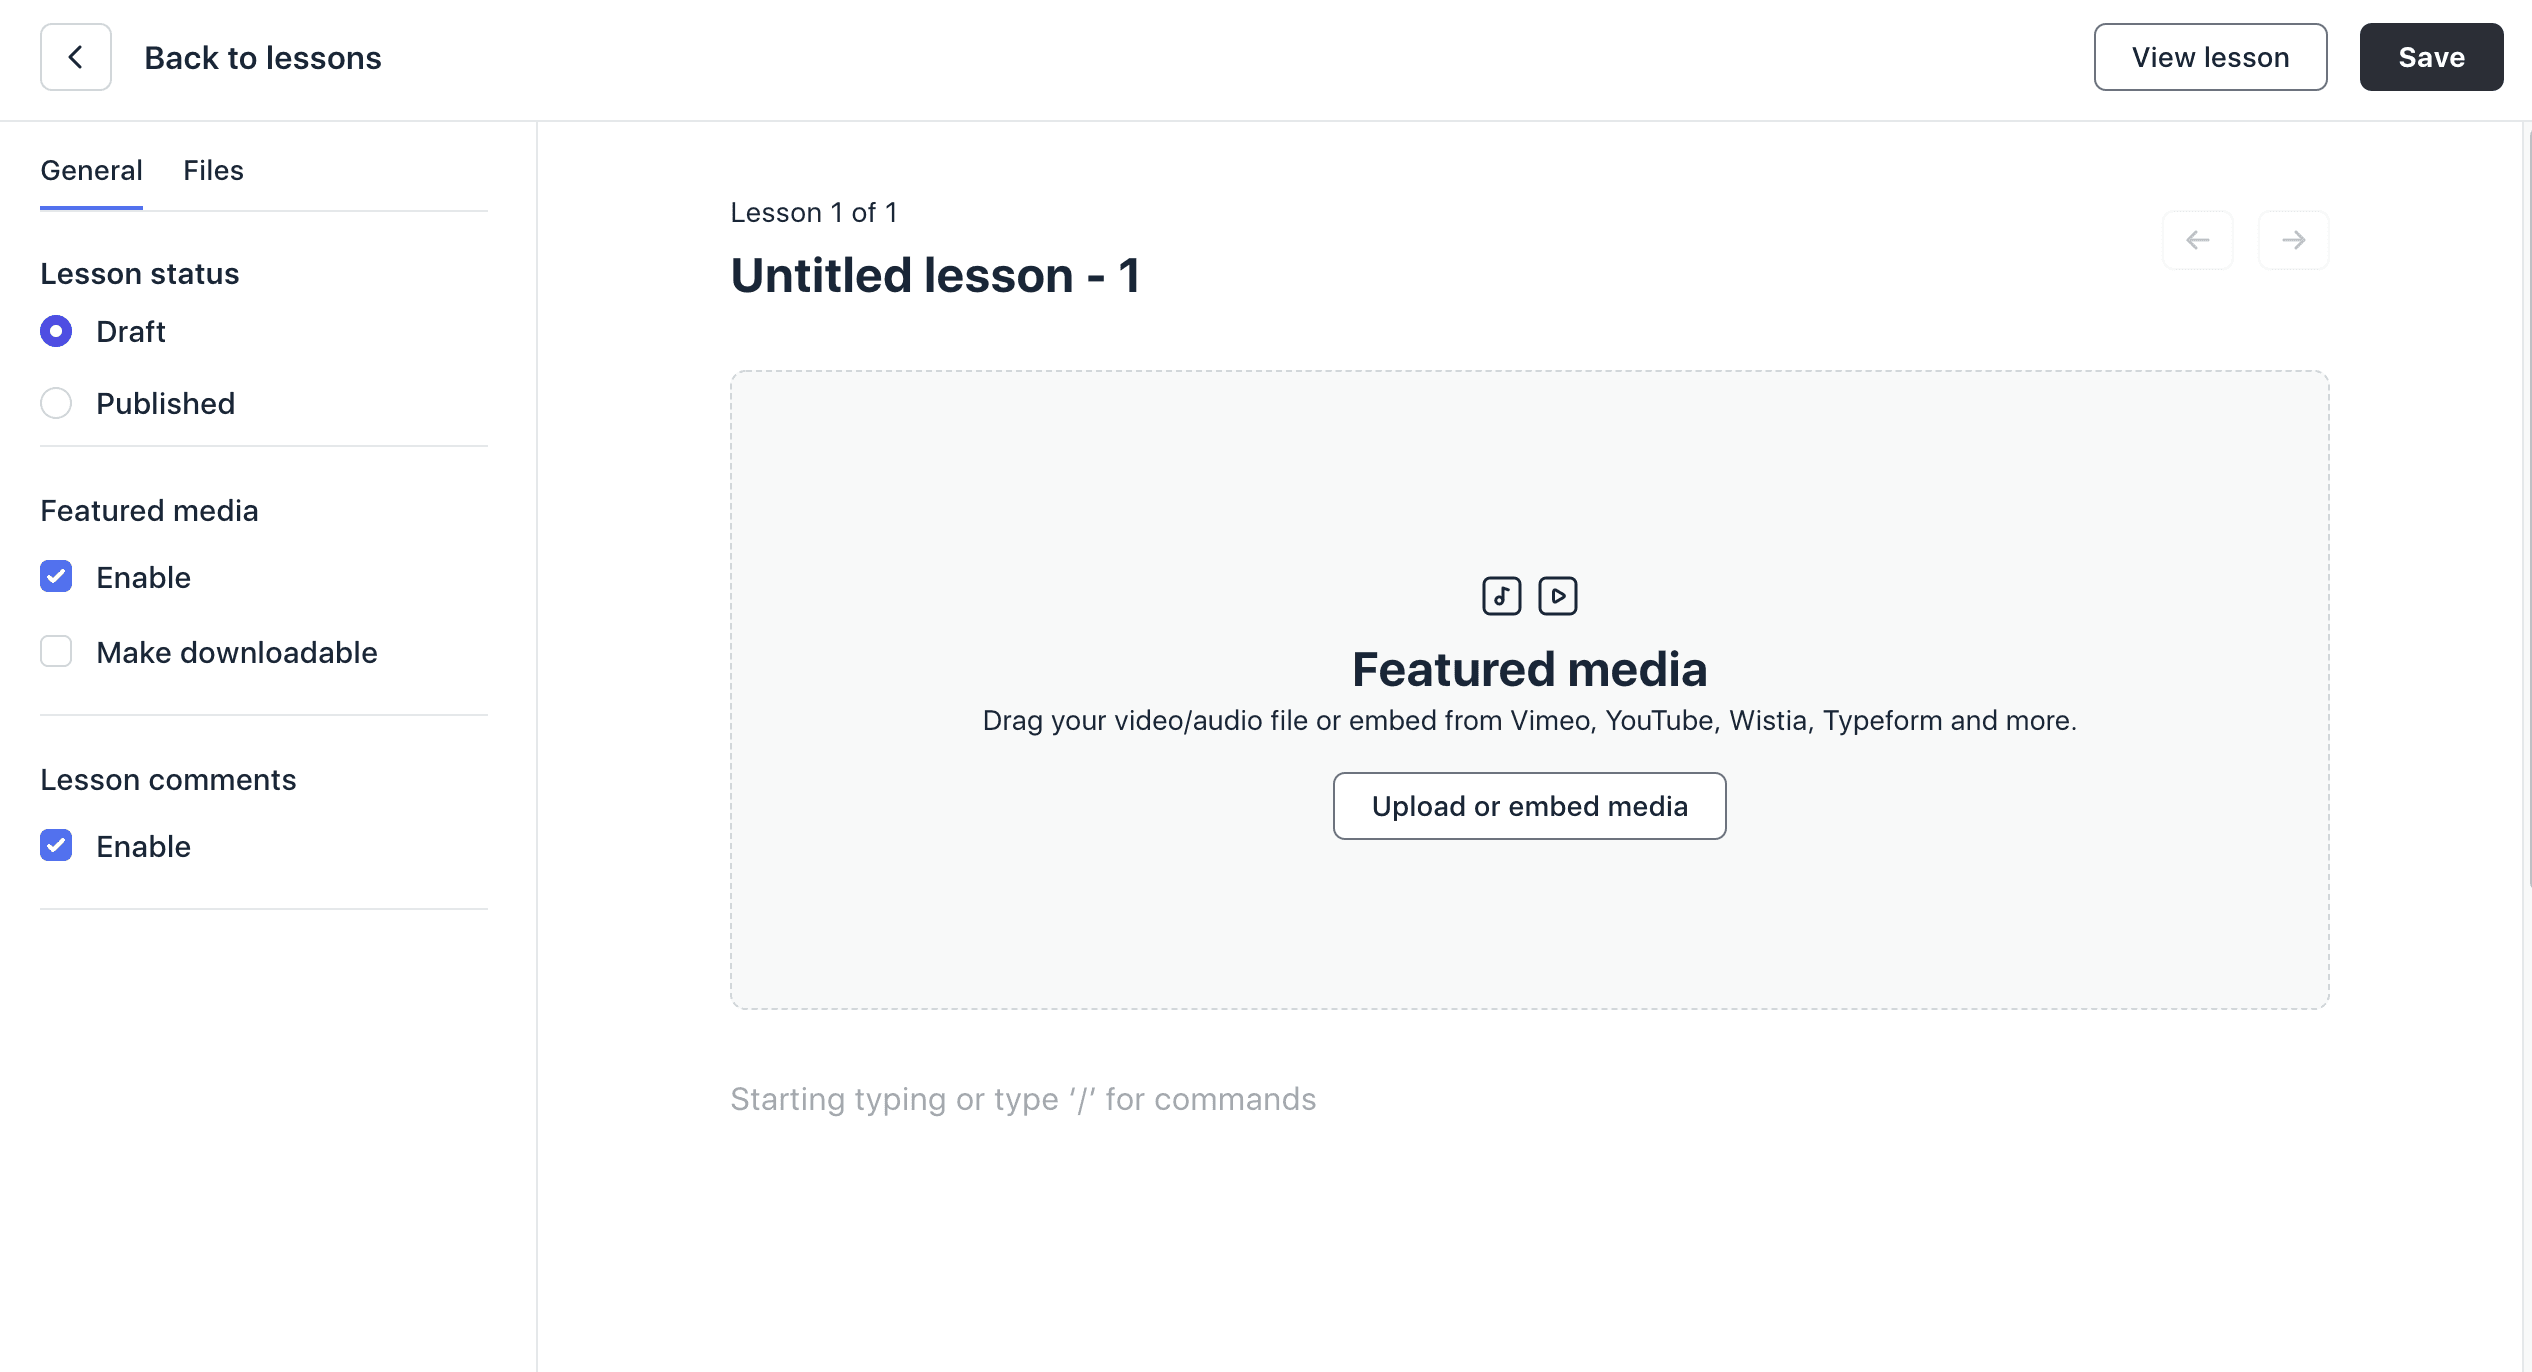
Once you’re satisfied, click ‘Save’ in the top right-hand corner and ‘View lesson’ to preview it. This helps you get a sense of what it’s like for students to go through the course. You can also navigate through your lessons in the editor by hitting the arrows above your video. This allows you to quickly make any changes, adjust the settings, and add any extra content. Circle makes it easy to work through your course lesson by lesson.
Final settings
Now that you understand how to publish a course, you can take a look at the extra options that Circle offers by hitting ‘Customize’ at the top of your screen.
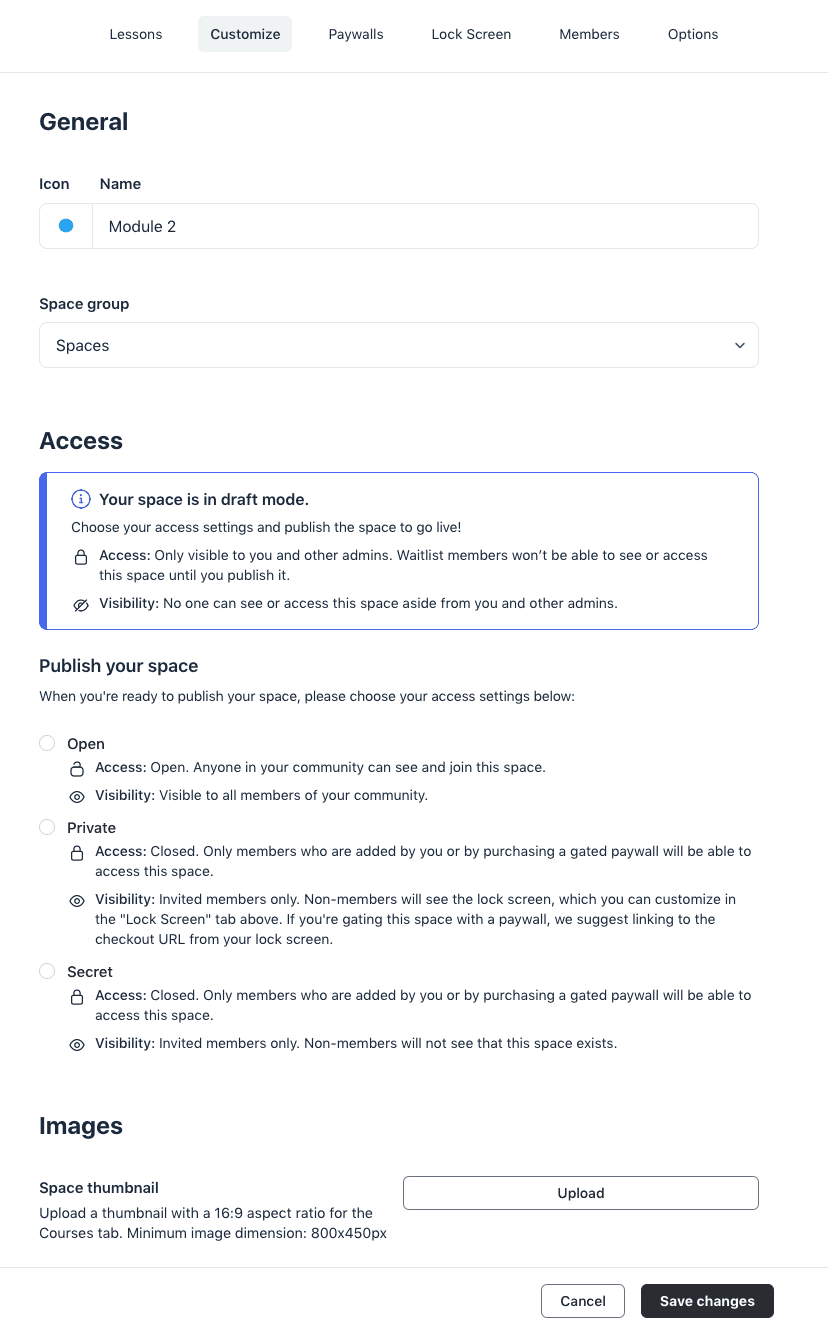
Here, you can rename your course, pick another icon, and choose how it's accessed. You can keep it open or restrict access and keep it behind a paywall. Circle also allows you to add a thumbnail, which helps your course stand out on the overview page.
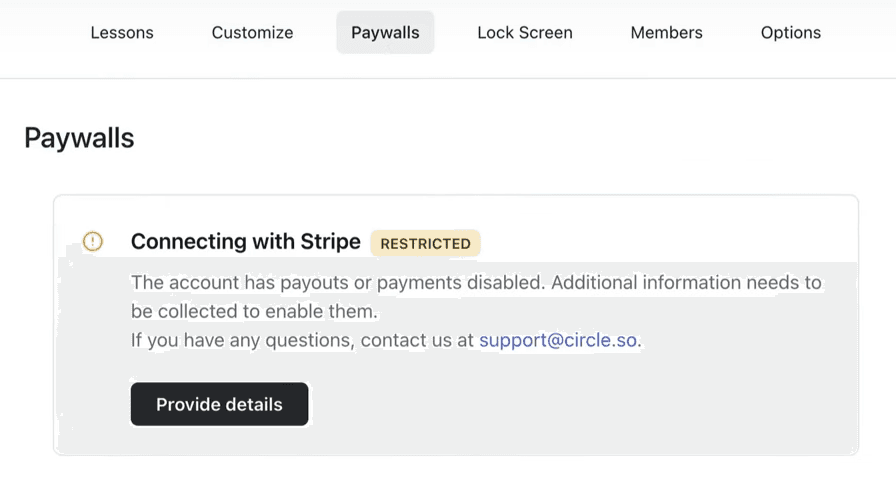
Hit ‘Paywalls’ to connect your Stripe account, which you’ll need to collect subscriptions and one-off payments.
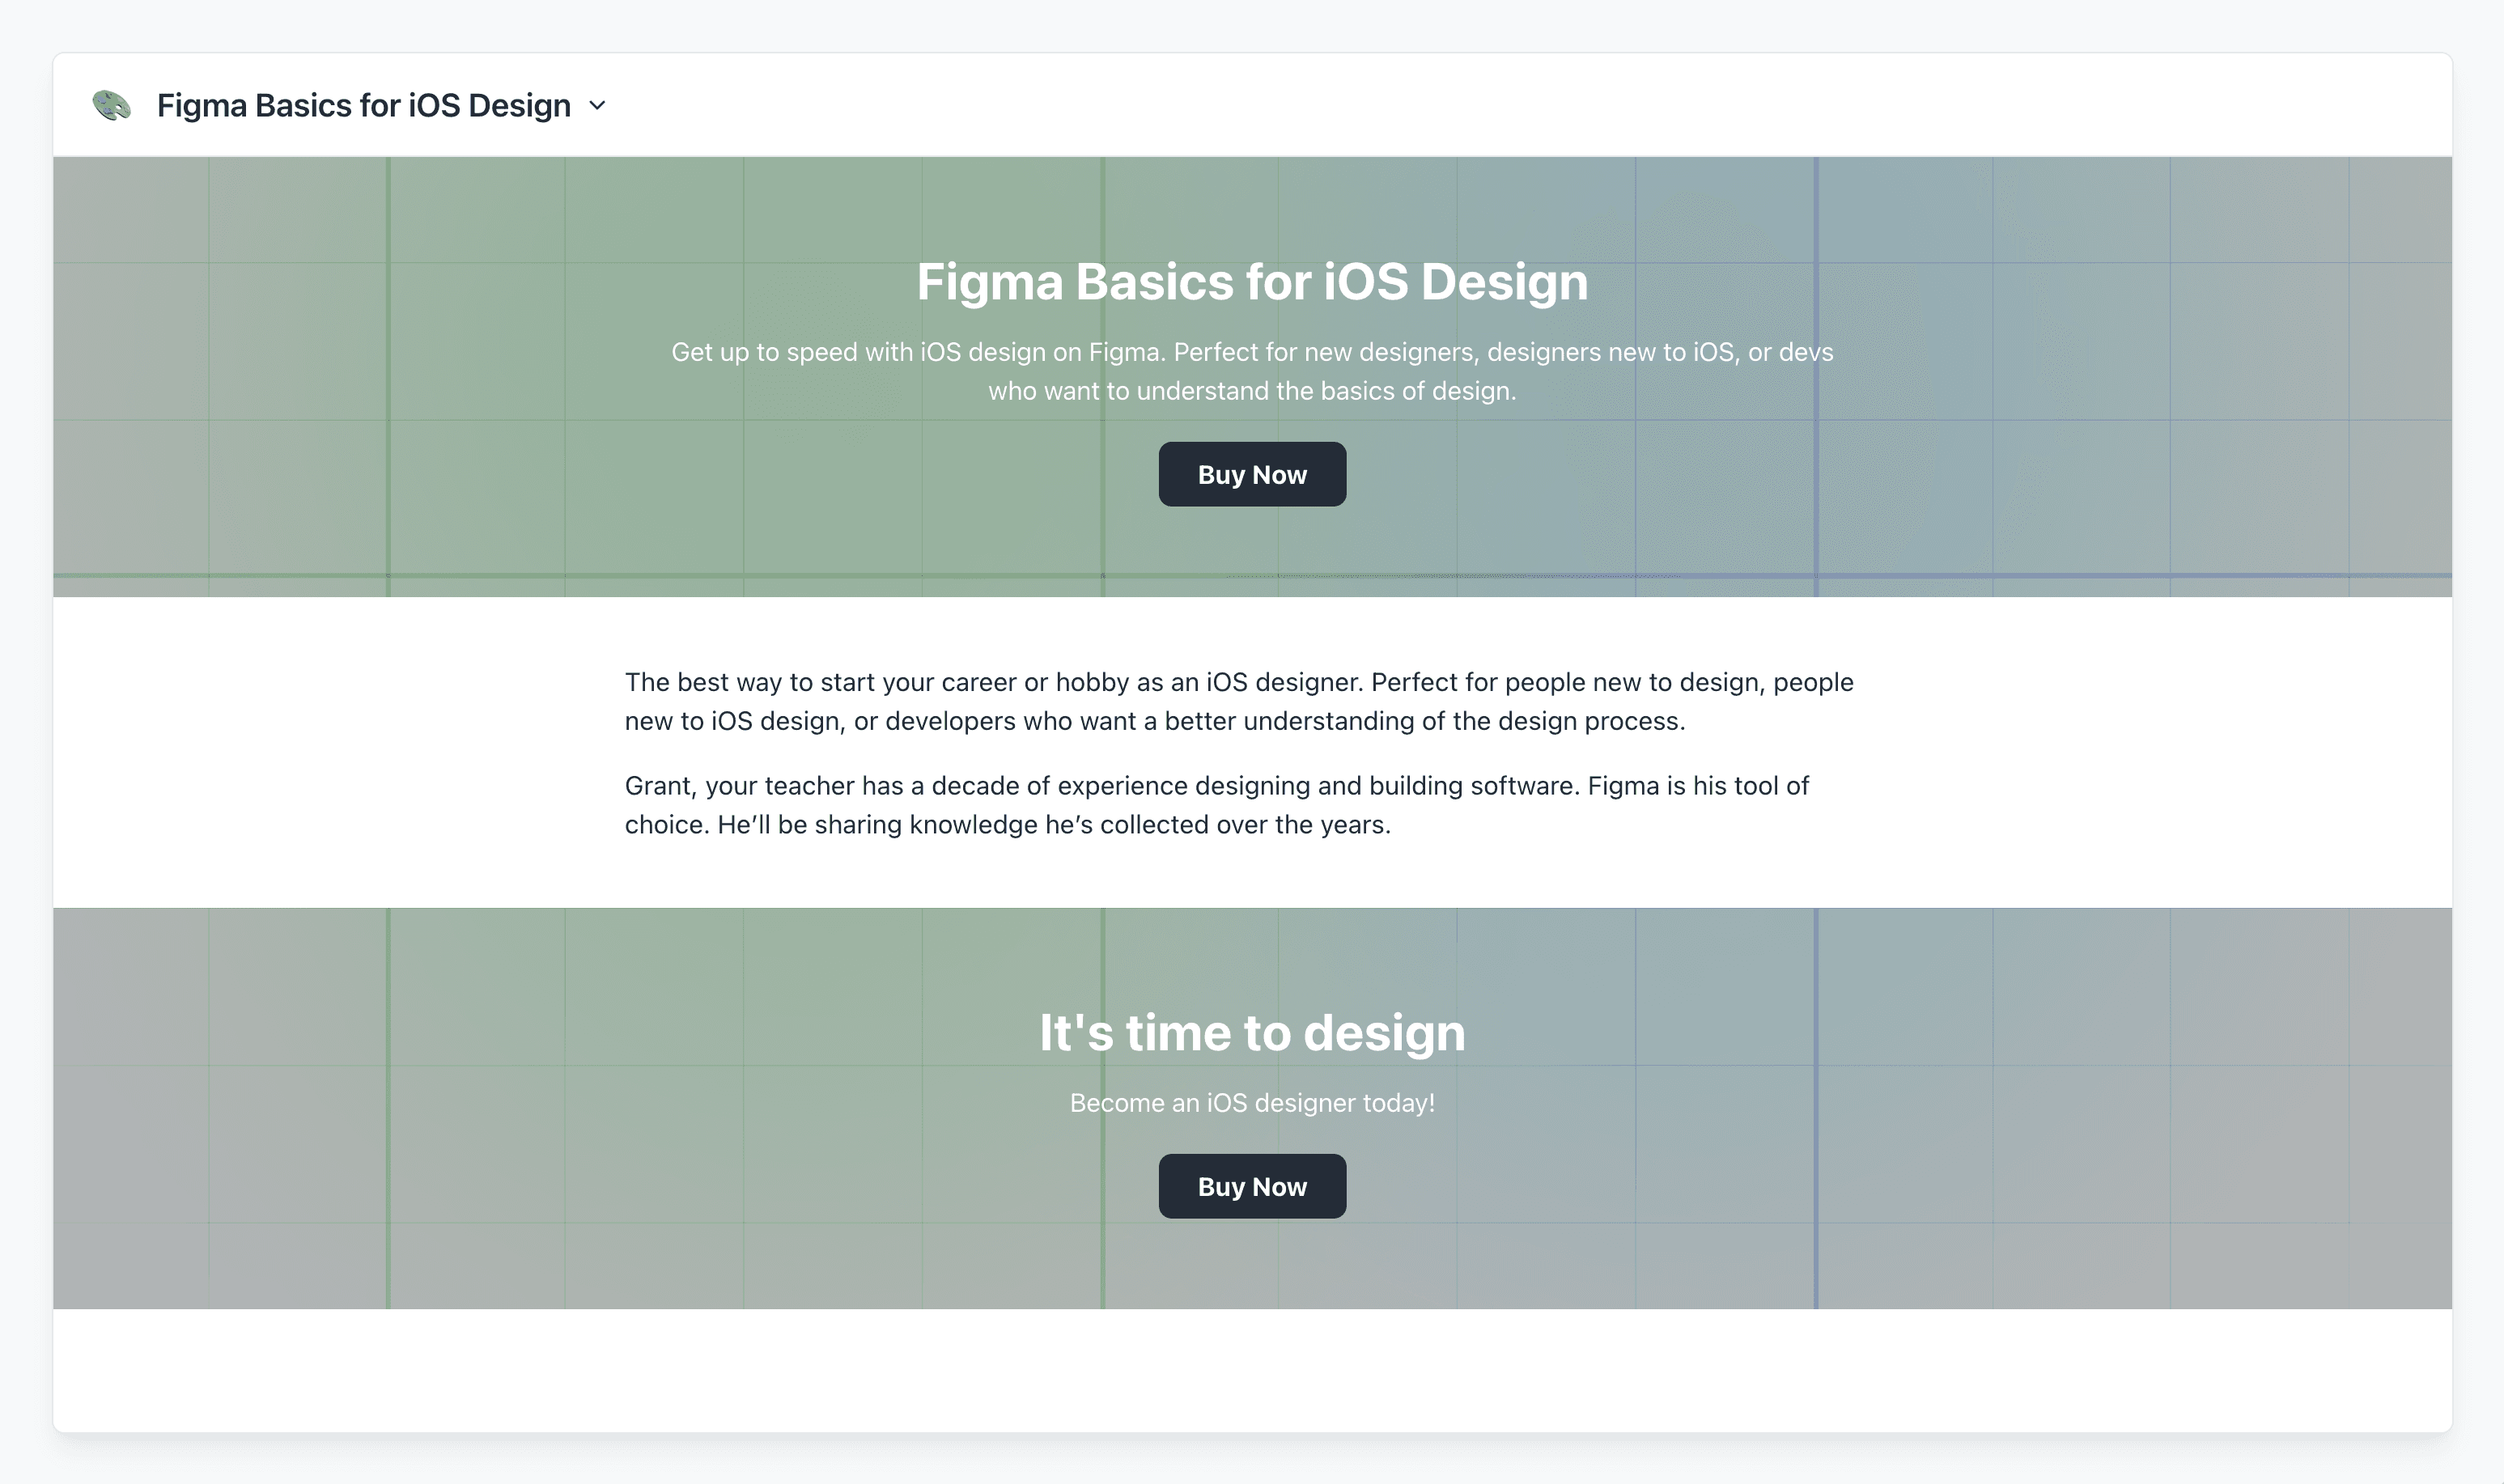
You can also design a lock screen for your course by setting a banner, description, and call to action. So when people come across your course who don't have access, they’ll land on this page. It’s your chance to convince them to buy it.
In the member's section, you can add people to your course, which is handy if you have a restricted course and want to invite people in individually.

With Circle, you have a bunch of options to enhance the SEO of your course. This means that search engines will index your course, and you can have some control over how it appears in search results.
You also have the option to add an Open Graph image, which is helpful if people share a link to your course elsewhere. Keep in mind that this doesn’t mean that people who access the course from this will be able to attend it. They’ll still need to pay for it if you have a paywall set up.
When you’ve made all your changes, hit ‘Save changes,’ and you’ll be taken back to the dashboard. And there you have it - that is how you create a course in Circle. It’s pretty easy when you know how. Here are a couple of things to keep in mind as you start creating your own online course:
Stick to the TICR framework to make the process predictable and easy to manage.
Use Tella to record your videos. Tella cuts out so much of the hassle when it comes to recording and editing online course videos. All you need to do is connect your camera, upload your slides, and you’re good to go.
Use Circle. It’s incredibly user-friendly and has a great workflow for adding courses. With Circle, you get all the power of an online community built in.
Not sure whether Circle is right for you? Here's our complete guide on the rest of the top creator subscription platforms you need to know.
Check out the video below for a closer look at making an online course with Circle and Tella.


Tella — the screen recorder that edits videos for you.
